In this article I will explain how I installed and configured the Update Manager Download Services on a CentOS 8 in my Homelab.
Let’s start from the beginning, what’s UMDS and why you should use it? so, UMDS aka VMware vSphere Update Manager Download Service is an optional module of Update Manager. UMDS downloads patch metadata, patch binaries, and notifications that would not otherwise be available to the Update Manager server.
Why that should not be avaiable on update manager, basically because our vCenter installation is on an isolated network and for security purpose this network can’t reach the internet.
In fact as we can read from the UMDS Documentantion page:
For security reasons and deployment restrictions, vSphere, including Update Manager, might be installed in a secured network that is disconnected from other local networks and the Internet. Update Manager requires access to patch information to function properly. If you are using such an environment, you can install UMDS on a computer that has Internet access to download upgrades, patch binaries, and patch metadata, and then export the downloads to a portable media drive so that they become accessible to the Update Manager server.
You can read all the documentend stuff from the page I’ve liked at the top but, before we get into the UMDS installation we must know few requirements regarding this “dude”:
- UMDS can be installed on Windows or Linux VM, so unlucky for you there isn’t an applaince:
-
- Ubuntu 14.0.4
- Ubuntu 18.04
- Red Hat Enterprise Linux 7.4
- Red Hat Enterprise Linux 7.5
- Windows Server 2012/2016/2019
-
- UMDS must be of the same version as the Update Manager server.
-
- For example, Update Manager 6.7 is compatible and can work only with UMDS 6.7. If you are using Update Manager server of 6.7 Update release version, UMDS must be of the same 6.7 Update release version, different version of UMDS and Update Manager will not work and you will not able to get the patches
-
Apart from what described above the other thing you must know is that if you want to point your Update Manager to the UMDS using the Web URL (that’s the main reason to build it and put in communication it with the vCenters), this “fun” part is not described on the documentation of VMware, so you need to build your web page from your own. Luckily for us a lot of people already did, I just wanted to do a recap article also because the things are changed from the previous version and the installation process became pretty straightforward than before.
For Example in the previous version for using UMDS, you needed to install a DB to store the configuration and all the other stuff, but from the 6.7u1 the db is no longer required so you can just install it and have fun with the configuration.
In my case I just installed a VM with Centos 8, so I’m not following the requirements but as you can see at the end of this article it works perfectly, of course, if you plan to do it on a Production environment just stick with the OS written on the VMware Documentation.
I configured the simple things like hostname, IP, and I’ve installed on it an apache service for the web repository that will be used by all my vCenters to download the latest ESXi patches.
The Image below is an overview of my home lab environment.
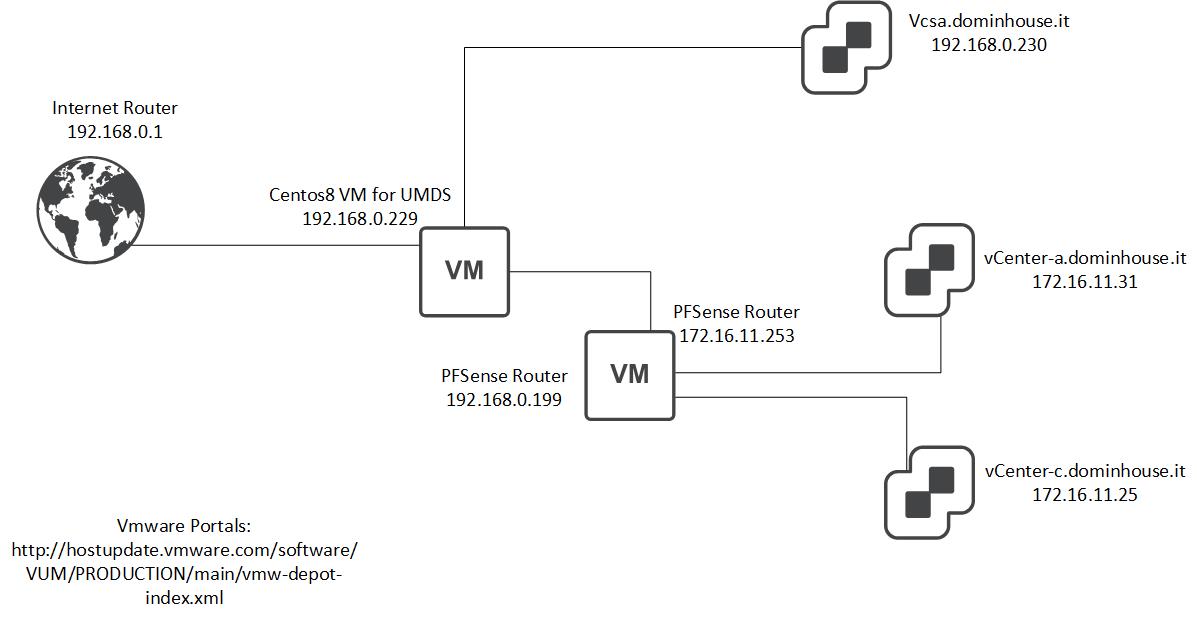
As you can see on the image above I have basically three vCenters, the first one at the top is the main one, let’s call it vCenter Father, this is the one that resides on my home network and it’s hosting the other nested vCenters and ESXi. On the network side, it is able to connect to the internet through the home-router and get the patches, as a standard environment.
In the image, you can see also, the other two vCenter that reside behind a PFSense router, on a different network. The VLAN attached to these two vCenters (172.16.11.0/24), doesn’t have access to the internet, so a perfect situation of the isolated management network. In this case, I’ve deployed a Centos8 VM on my home network in order to use UMDS as a repository for the ESXi 6.7 patches and get these two environments properly patched.
So the first thing is to install the Centos 8 VM, you can do that from a template or by downloading the ISO from the website. If you need some specific guidance on how to install this VM on your vsphere environment you can follow this post. When you do you need to install on your Centos8 VM the following packets as a pre-requisites for the UMDS installation:
- perl
- tar
- sed
- psmisc
- httpd
- libnsl
Remember also to disable the firewall
- sudo systemctl disable firewalld
or allow the traffic for the port 80/443 by using this command:
- # firewall-cmd –zone=public –add-service=http
- # firewall-cmd –zone=public –add-service=https
- firewall-cmd –reload
Let’s enable httpd if is not present install (install guide) it with:
- sudo yum -y install httpd
Then activate and enable it:
- sudo systemctl start httpd
- sudo systemctl enable httpd
- sudo systemctl status httpd

In my case, I needed also to add a permanent static route on my UMDS VM because my home router doesn’t support the static routes. So in order to put in communication my UMDS with the vCenters behind PFSense I’ve added this line on the /etc/rc.local file:
-
-
- /sbin/route add -net 172.16.11.0/24 via 192.168.0.199 dev ens192
-

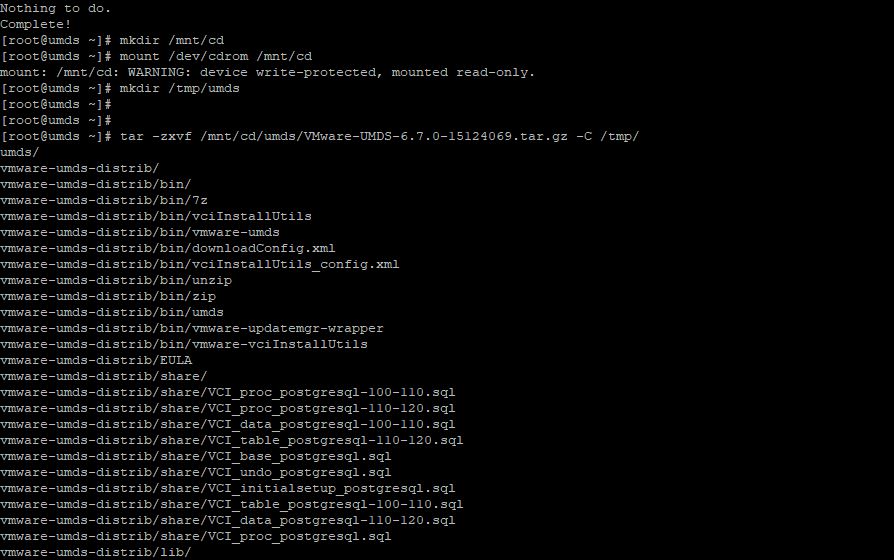
Now we can proceed with the UMDS installation, first thing first is to download the vCenter Appliance ISO file, this should be the same version of your vCenters, in my case all my vCenters are on 6.7 build number 15976728 so I can use this file: VMware-VCSA-all-6.7.0-15976714.iso, and then connect this ISO to the UMDS and proceed with the installation.

Create a directory with:
-
-
- mkdir /mnt/cd
-
Mount the Iso file with:
-
-
- mount /dev/cdrom /mnt/cd
-
Create another directory where copy the installation files:
-
-
- mkdir /tmp/umds
-
Launch this command for export the needed file and save them to the folder created before:
-
-
- tar -zxvf /mnt/cd/umds/VMware-UMDS-6.7.0-15124069.tar.gz -C /tmp/umds
-
Now you can launch the UMDS installation by using the command:
-
-
- /tmp/umd/vmware-umds-distrib/vmware-install.pl
-
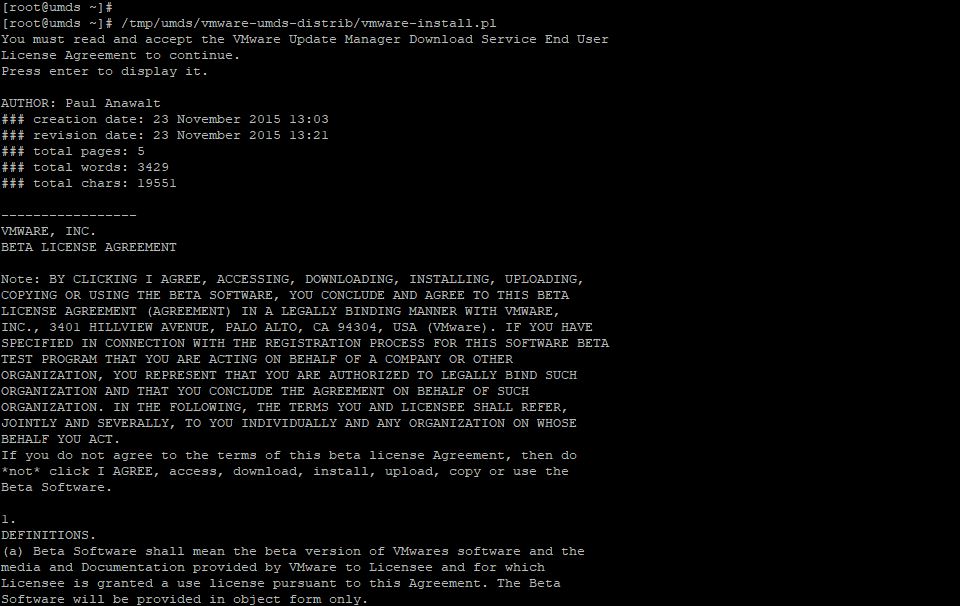
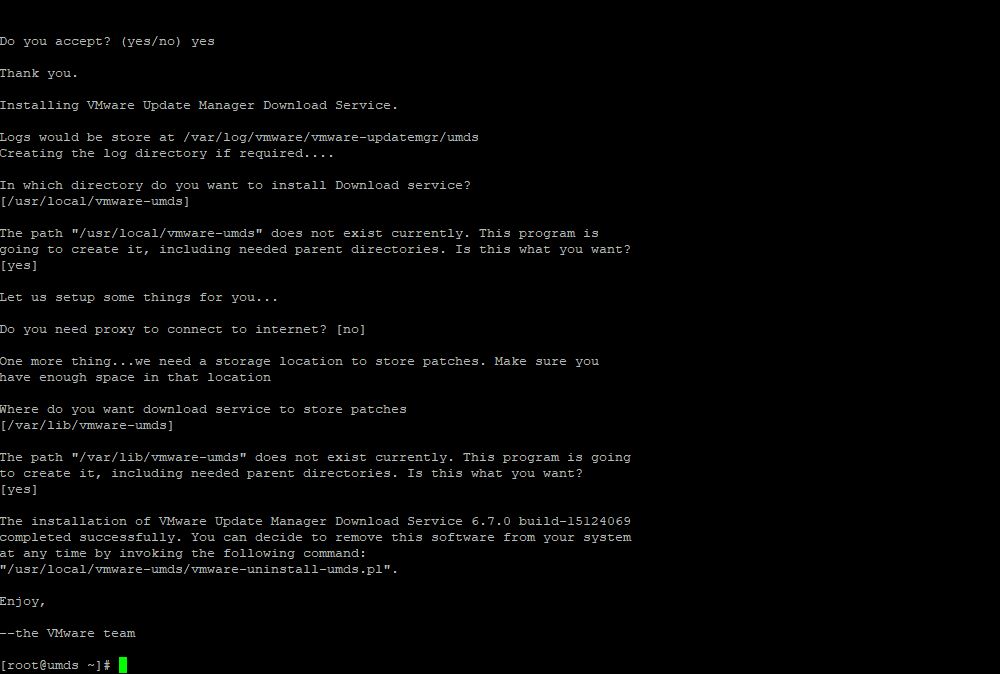
Read and accept the EULA by typing “yes”

Then the installation process will ask you in which directory you want to install UMDS, in my case I’ll stick with the default configuration, you can see the step below if you wanted during this steps you can change these parameters and install UMDS where you prefer.
In my case after the installation completed I wanted to check the configuration of UMDS by using this command:
-
-
- /usr/local/vmware-umds/bin/vmware-umds -G
-
But I forgot to install a “libnsl” needed to use UMDS and its commands. So I get an error, I’ve installed libnsl as you can see below, and after I was able to run UMDS commands.

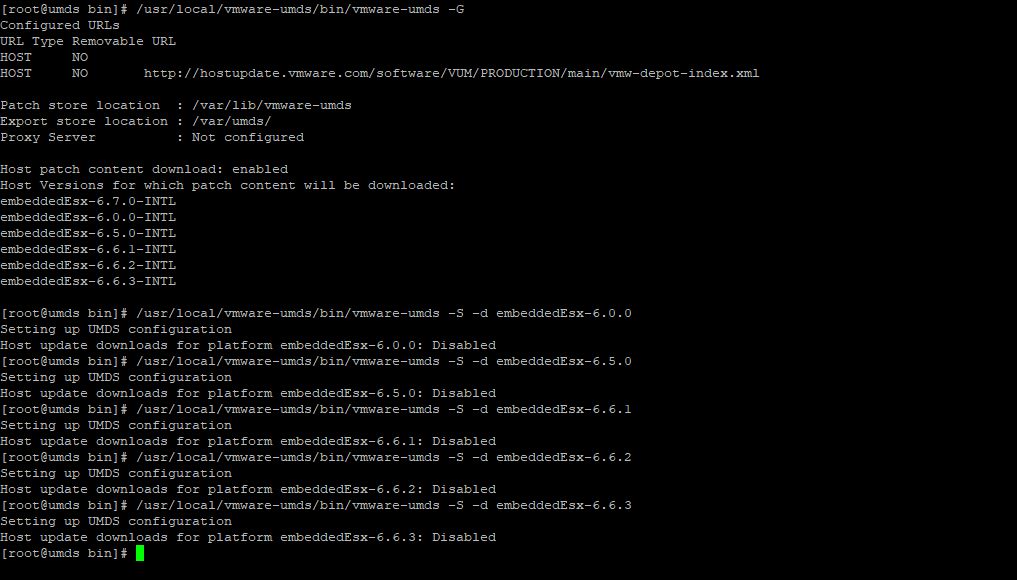
As you can see in the image above I was able to run the command that shows the configuration. You can see that the default configuration is set up to download all the ESXi version form 6.0 to 6.7, in my case I don’t need the version before 6.7 so I’ve just left enabled the 6.7 and disabled the remaining ones by using this command:
-
-
- /usr/local/vmware-umds/bin/vmware-umds -S -d embeddedEsx-6.x.x
-
The other thing I’ve made on the configuration of UMDS is changing the download URL of VMware from HTTPS to HTTP in order to allow the download, saw it from this article.
For doing that I use this command “vi /usr/local/vmware-umds/bin/downloadConfig.xml” to open the download configuration file and change this line:
<ESX4xUpdateUrl>http://hostupdate.vmware.com/software/VUM/PRODUCTION/main/vmw-depot-index.xml</ESX4xUpdateUrl>
I’ve also configured another thing on UMDS the export location, so where the folder and files for patching will be stored. In my case I created a new directory on /var/umds, and then I launched the command to set up the UMDS export folder.
-
-
- /usr/local/vmware-umds/bin/vmware-umds -S -o /var/umds/
-
After this, the basic configuration of UMDS is done, for the apache configuration basically I wouldn’t do anything special, just check if it’s working by putting on my browser the IP addresses of the UMDS and then I’ll create a symlink between folders in order to publish the content of this specific directory /var/umds.
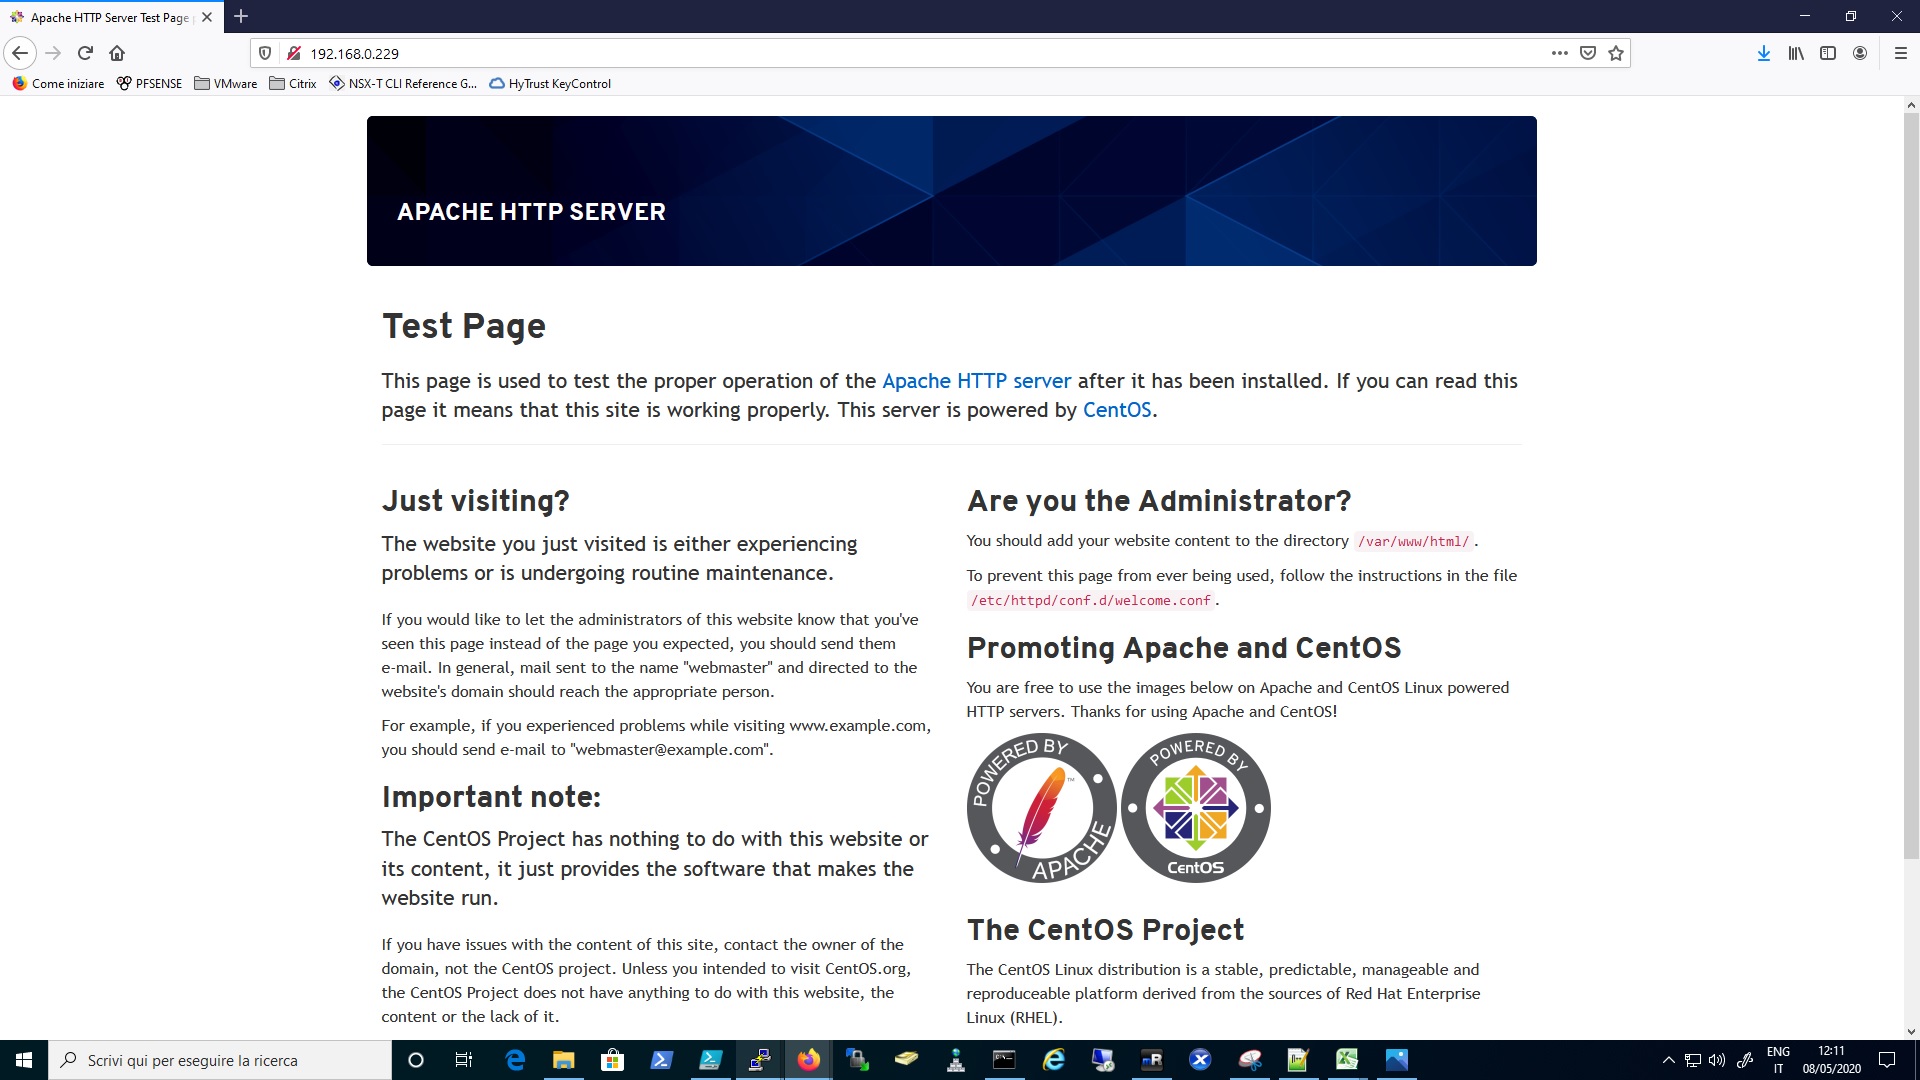
So let’s check first of all if Apache is working, by putting on the browser the IP of the UMDS VM in my case: http://192.168.0.229.
You should see something like below.
Okay, it’s working, now we need to create the symbolic link between the folder where I will have all the patches and a new folder in the apache directories.
You can use the command below to create the symlink:
-
-
- ln -s /var/umds/ /var/www/html/umdsdownload67
-
and you can check if the symbolic link is in place by using the “ll” command to list the directories in this way:
-
-
- ll /var/www/html
-
you should see something like this
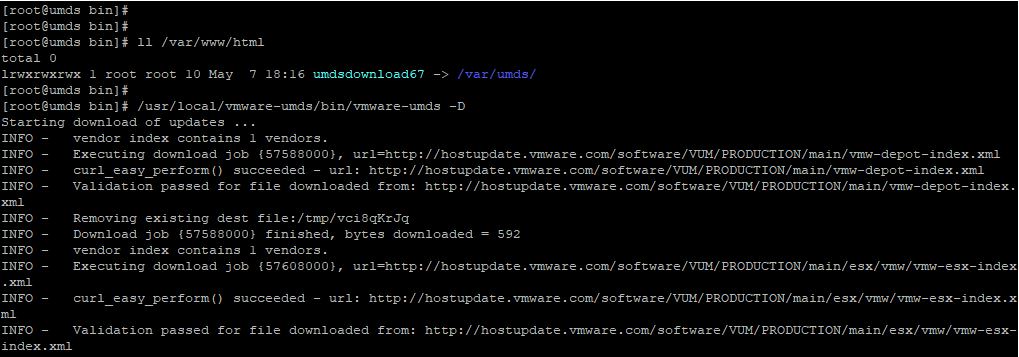
I’ve also used another command on the image before, the /usr/local/vmware-umds/bin/vmware-umds -D used for download the patches from the portal.
When the UMDS complete the download task I need to export them by using this command:
/usr/local/vmware-umds/bin/vmware-umds -E
And then I can check directly on the web page: http://192.168.0.229/umdsdownload67
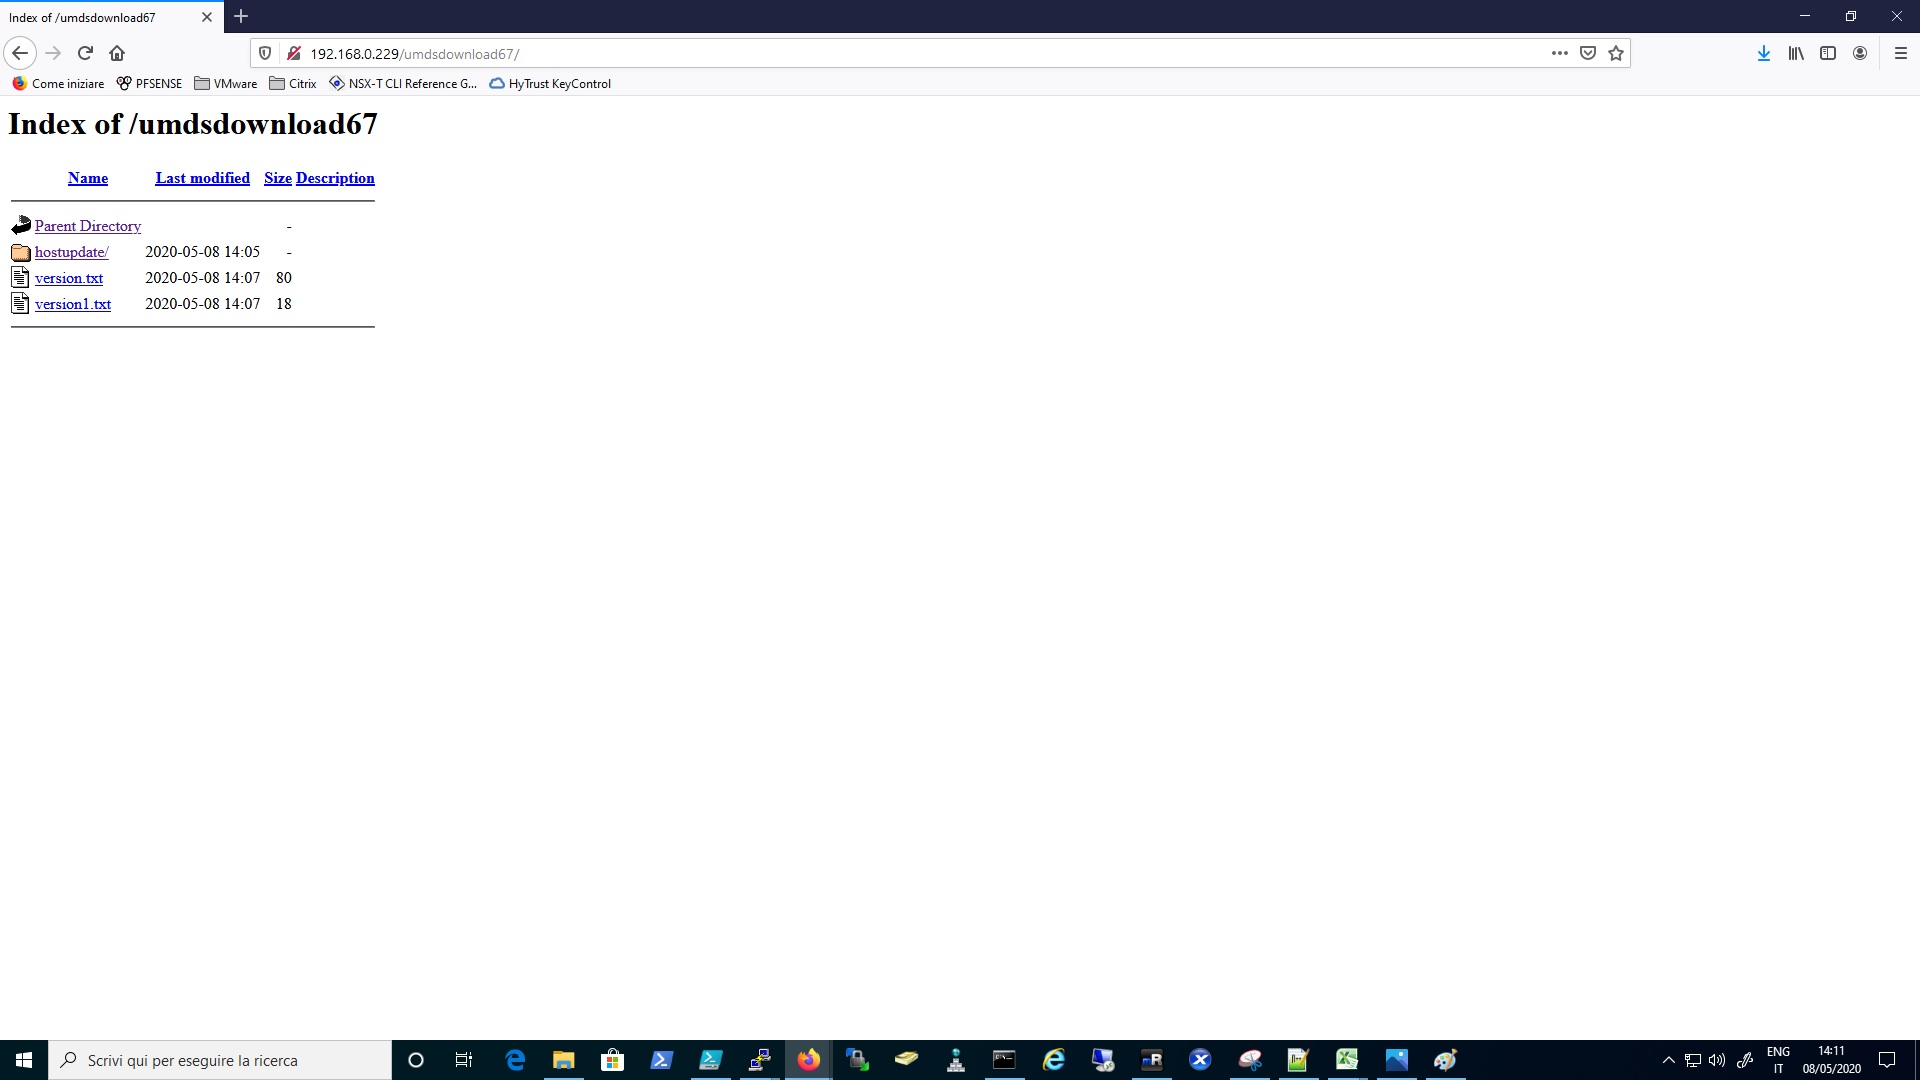
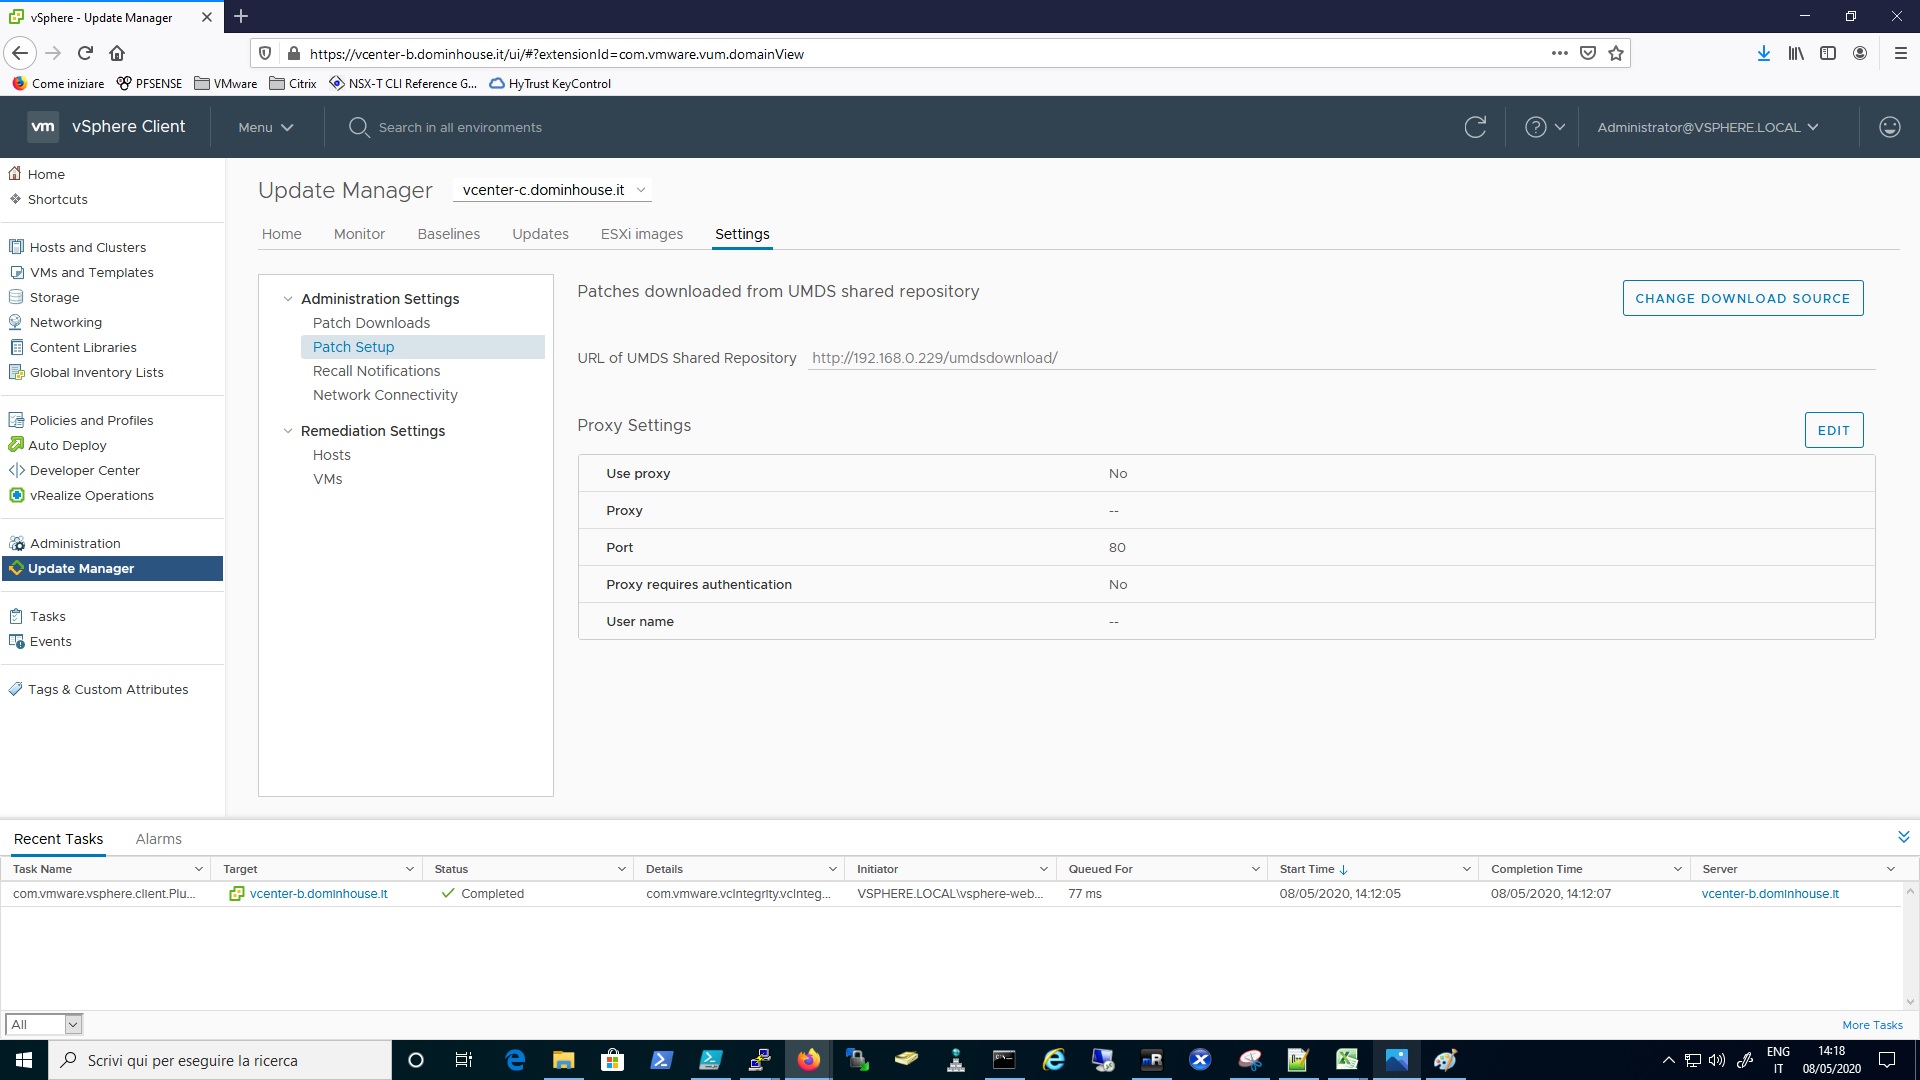
It works! The last step is changing the configuration on the Update Manager under Settings, Patch Setup and Change Download Source as showed below
After that I can get all the ESXi patches in an automatic way without download and import manually the ESXi patches.
I hope this will be helpful, If you have questions or doubts write in the comment.