In this article, I’ll show you how I upgraded my home lab 6.5 environment to 6.7.
This scenario is configured with two PSC behind a Load Balancer and a vCenter Server 6.5 connected to it.
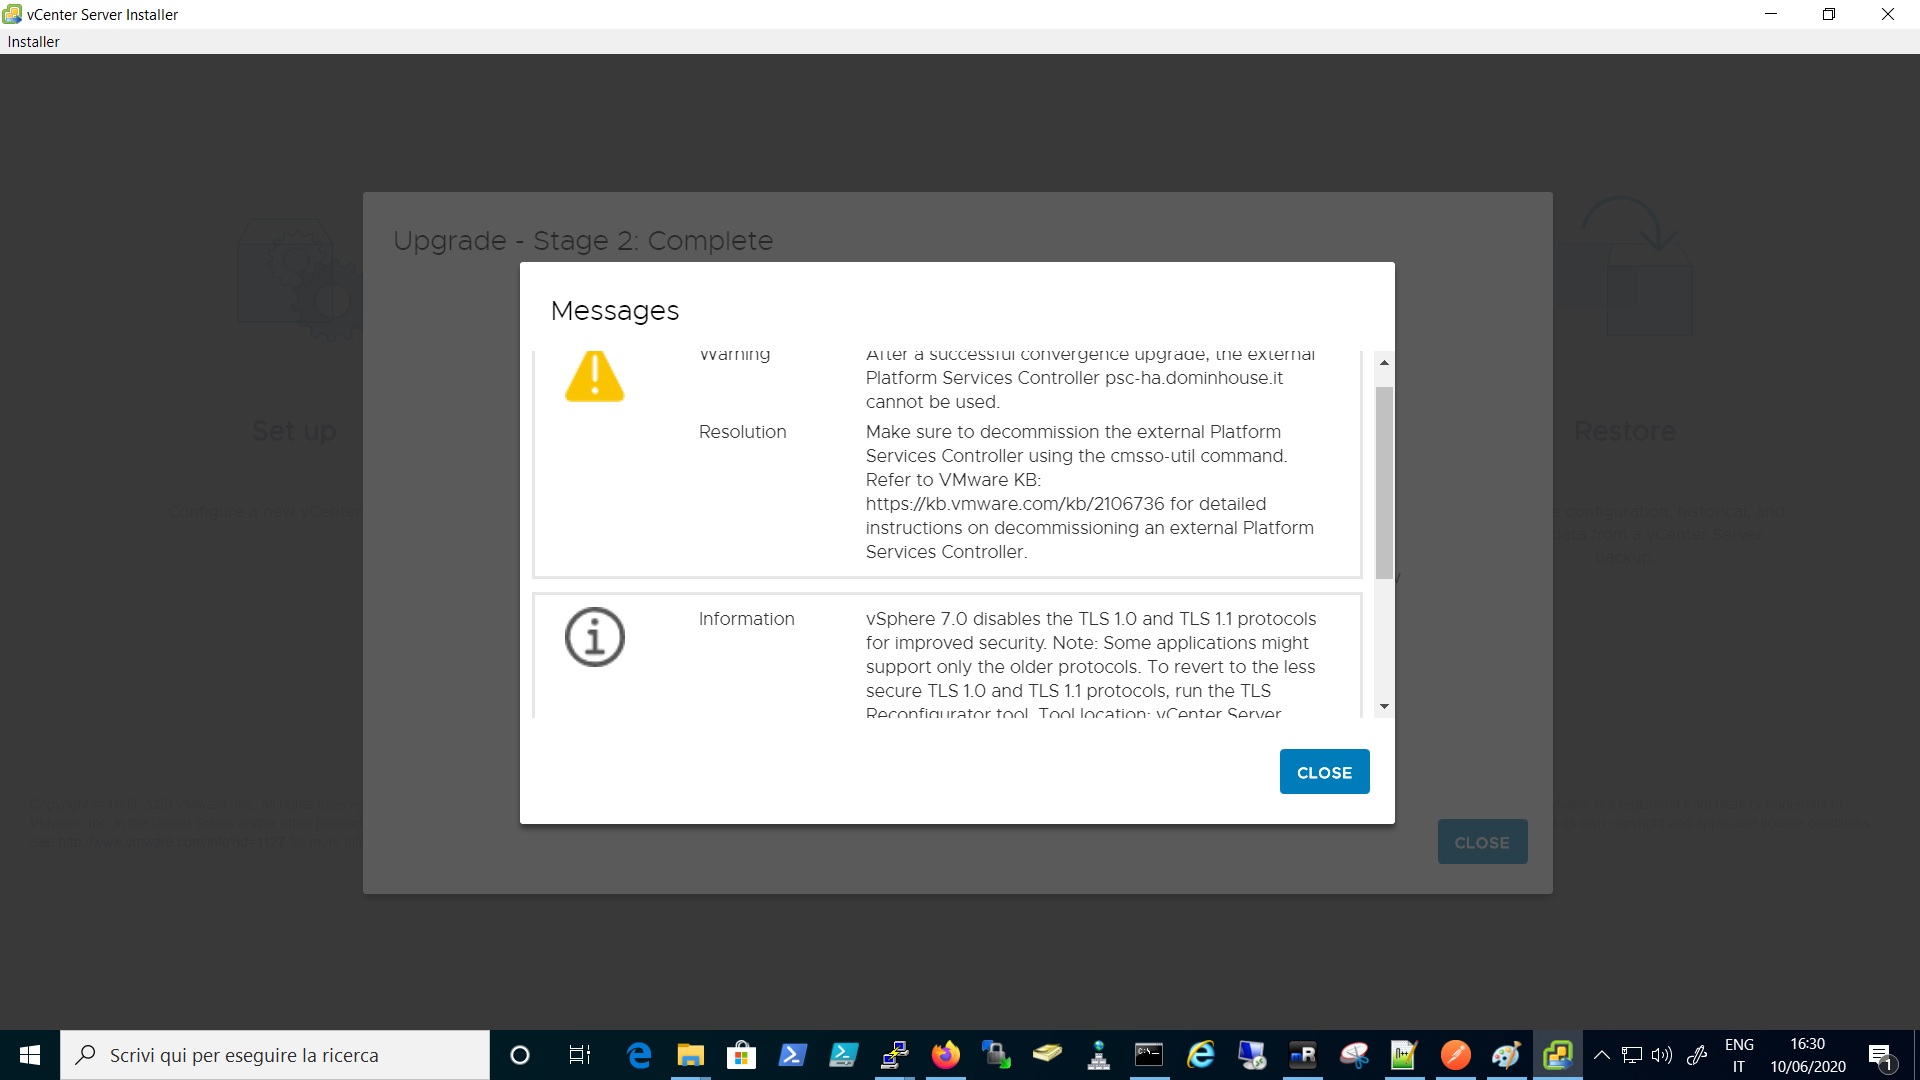
I wanted to try the upgrade procedure also to see how it works the all in one process that basically upgrade the vSphere versions but also the convergence process that basically decommission the external PSC because they are deprecated and official unsupported from the version 7.0. See this KB.
As you can see from the Upgrade Path matrix the upgrade is fully supported from both 6.5 and 6.7GA and above. There is also a nice official article based on this on the VMware Blog.
Okay so, just a brief list f what we will do in order to start the upgrade process:
- Check the Compatibility Matrix with vSphere 7.0 of your VMware Solution (SRM,NSX,vRealize Suite etc..) or Third Party Solution (Veeam, Zerto, Spectrum Protect etc..)
- vCenter 7.0 ISO (Download it from the myVMware Portal.
- Backup all the PSCs and vCenter
- Do the Snapshot Before the Upgrade
- Start the Upgrade and Follow the Wizard
Hereunder I put a simple image to understand the scenario, and then I will go through the steps to accomplish the upgrade.
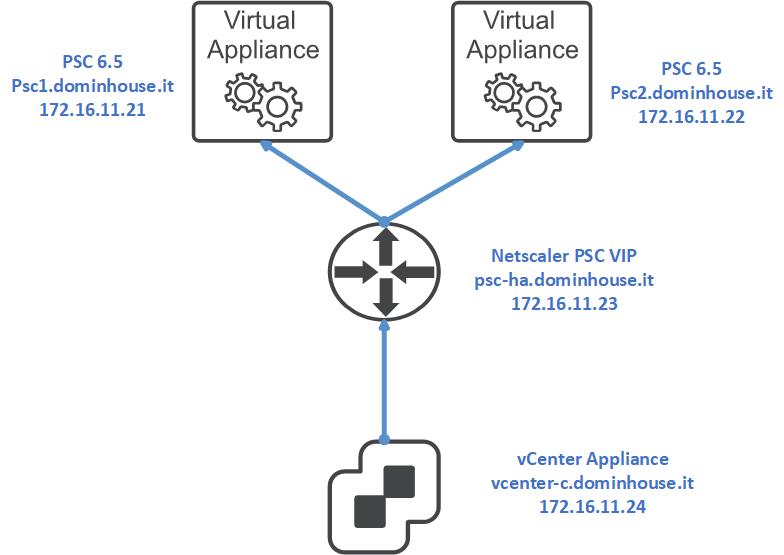
As you can see in the image below I set up a simple Test Environment just to have a look at the upgrade procedure. In my case, I previously downloaded the Center 7.0 and also already performed the backup and snapshot for the PSCs and the vCenter appliances.
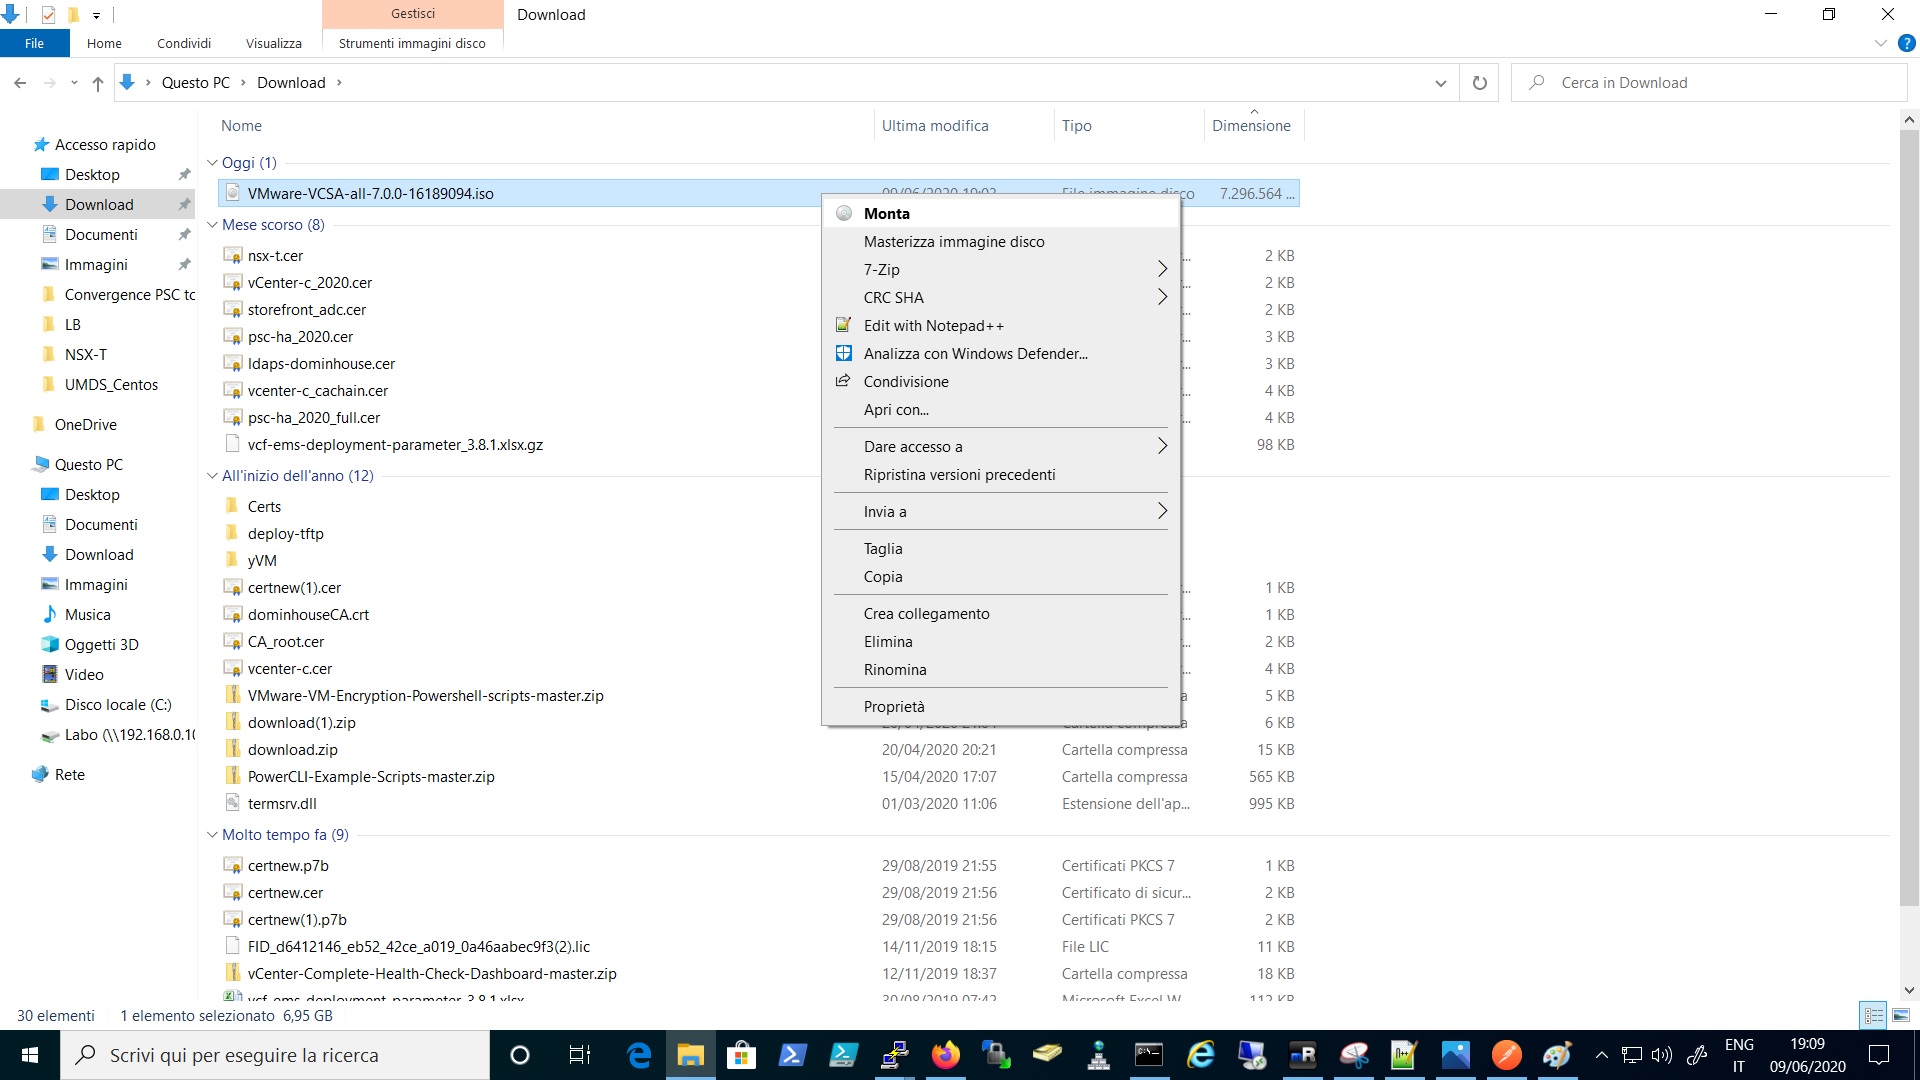
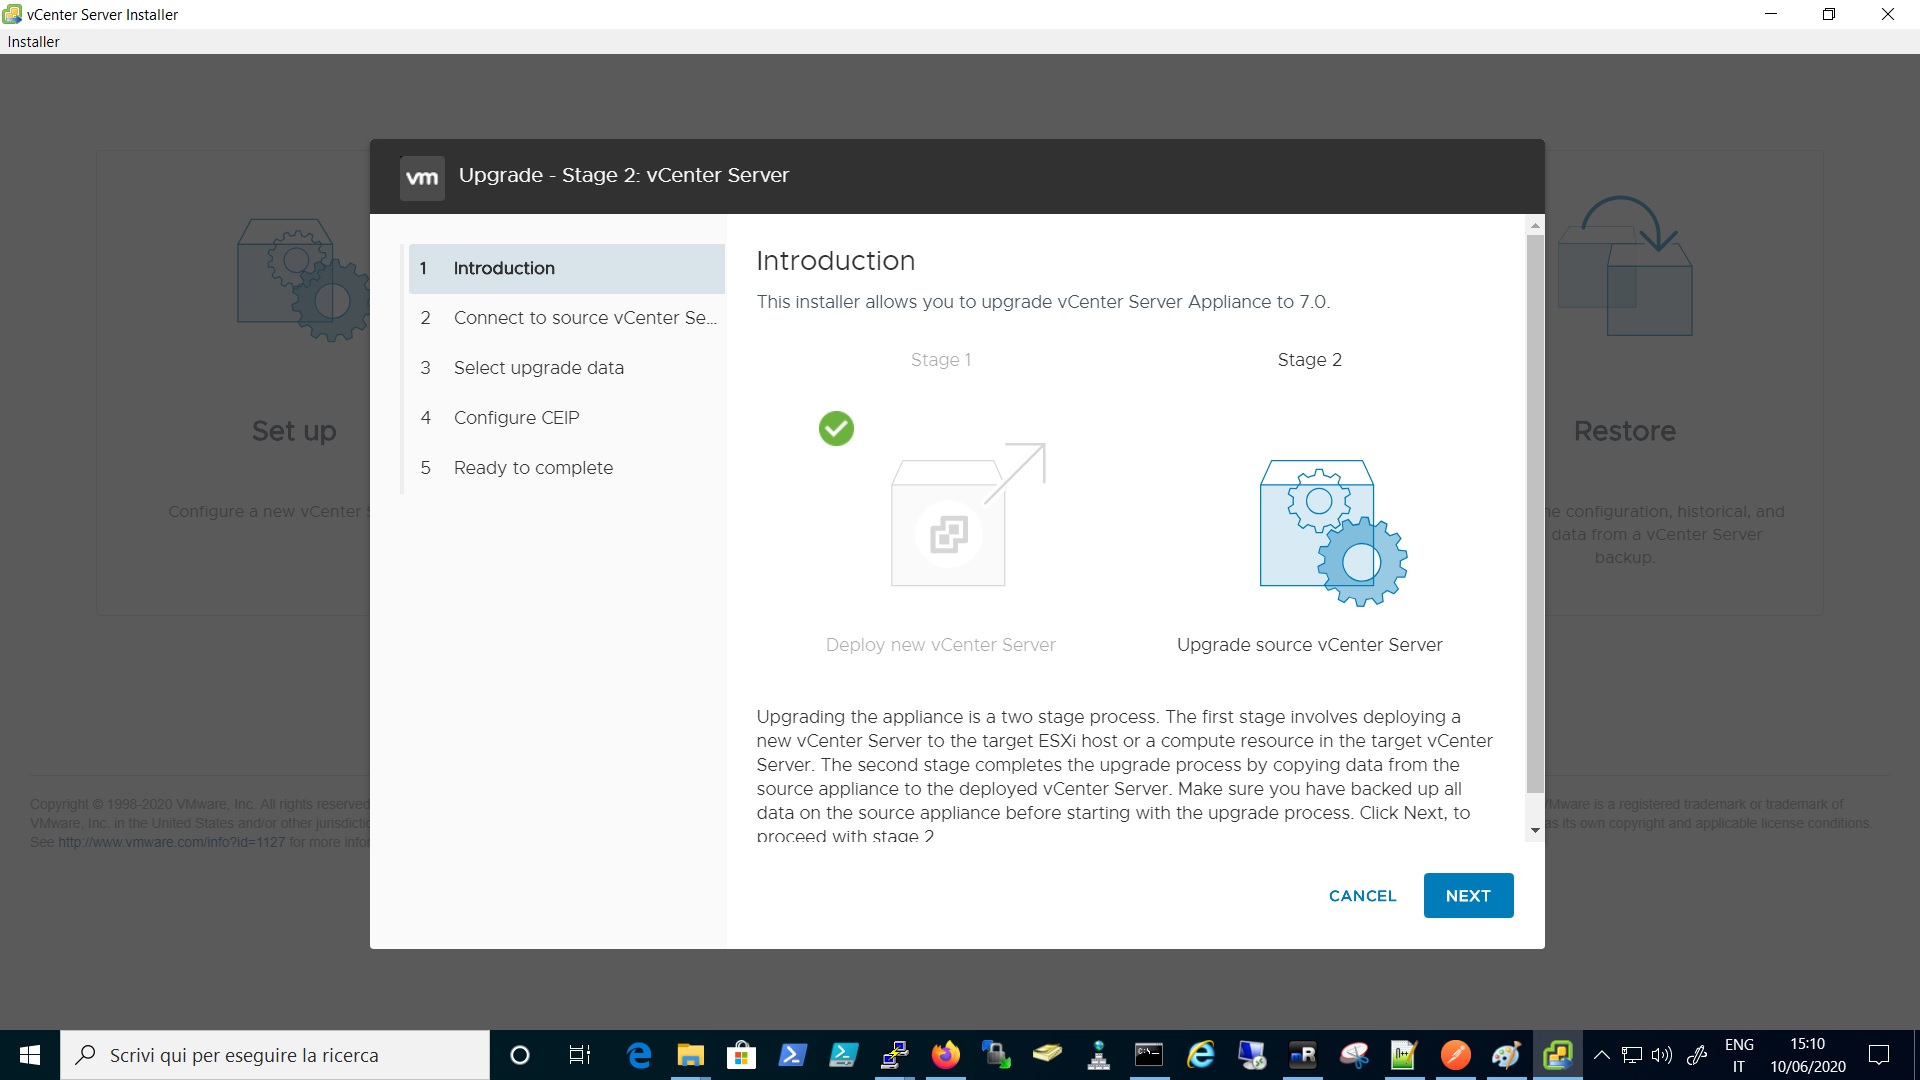
So after this brief introduction let’s start the upgrade to 7.0, by mounting the ISO to the Client VM and launch the Wizard.

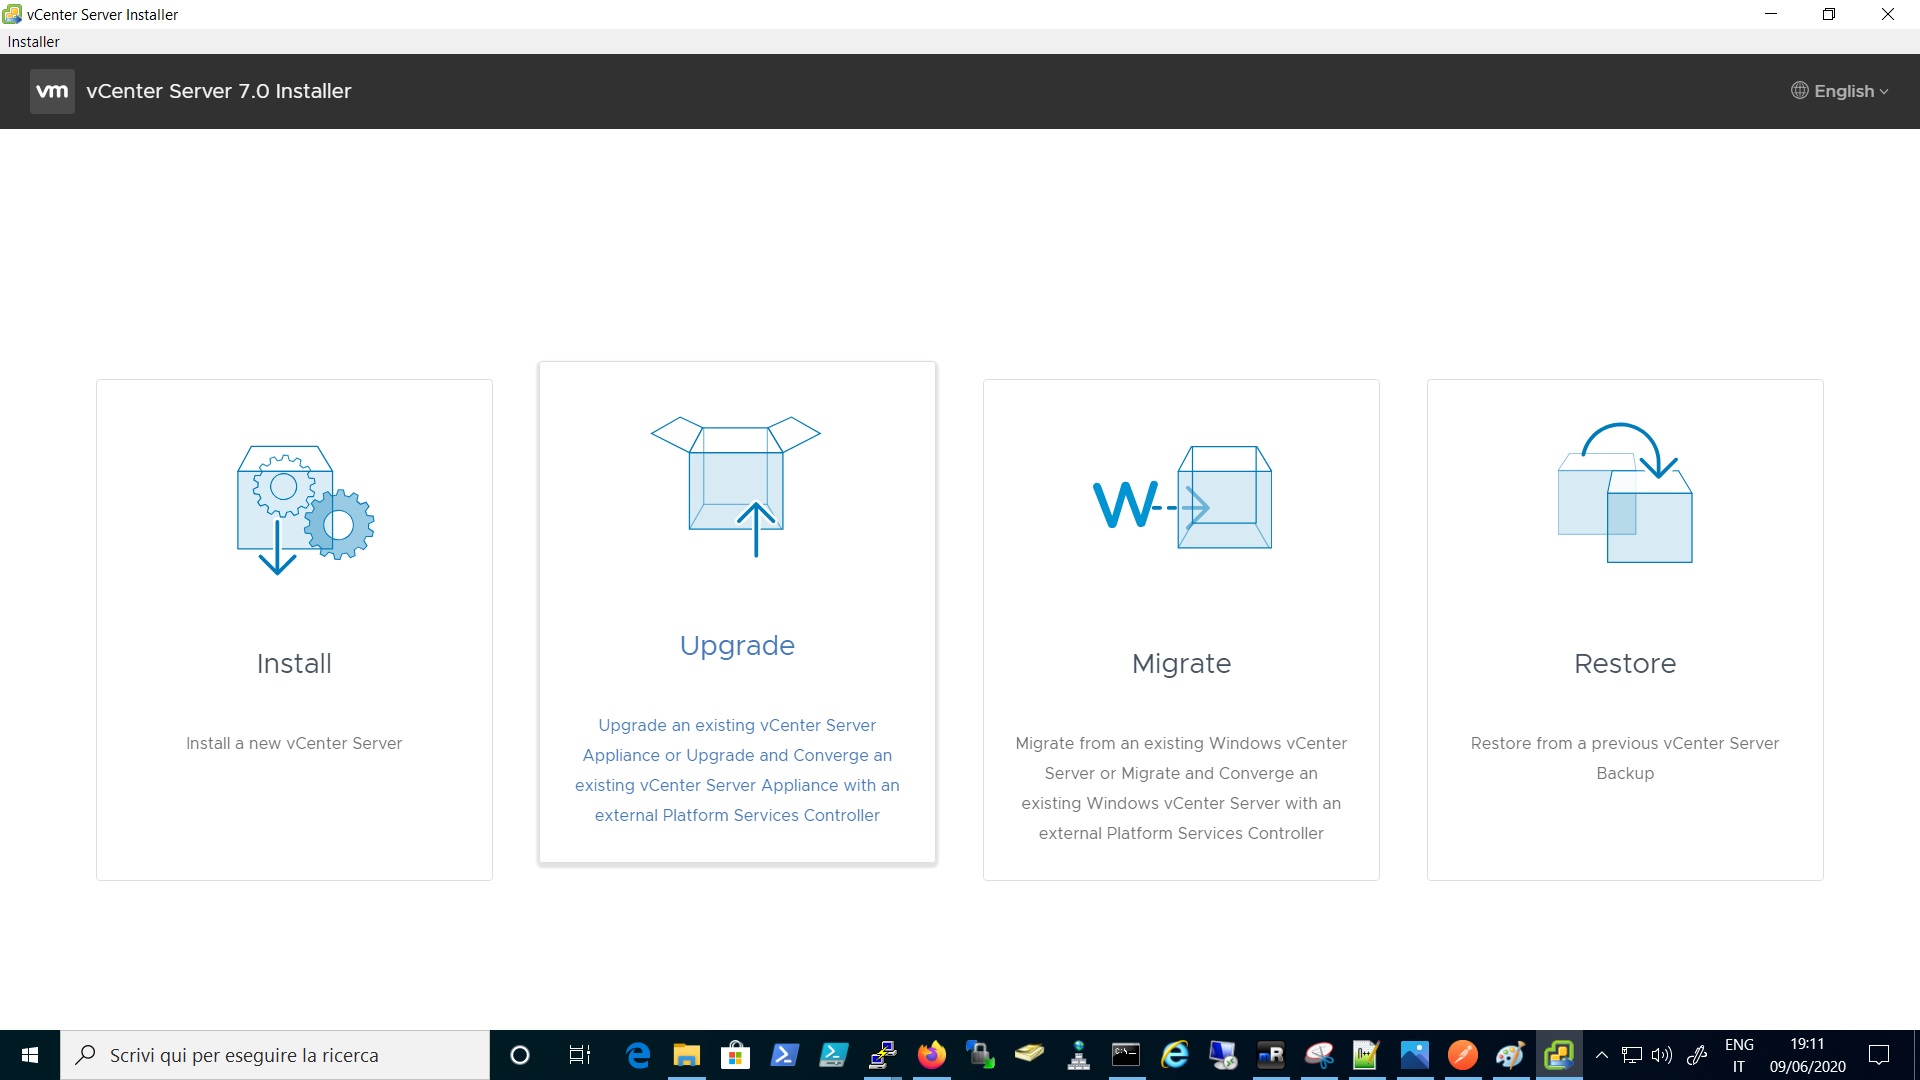
Select Upgrade
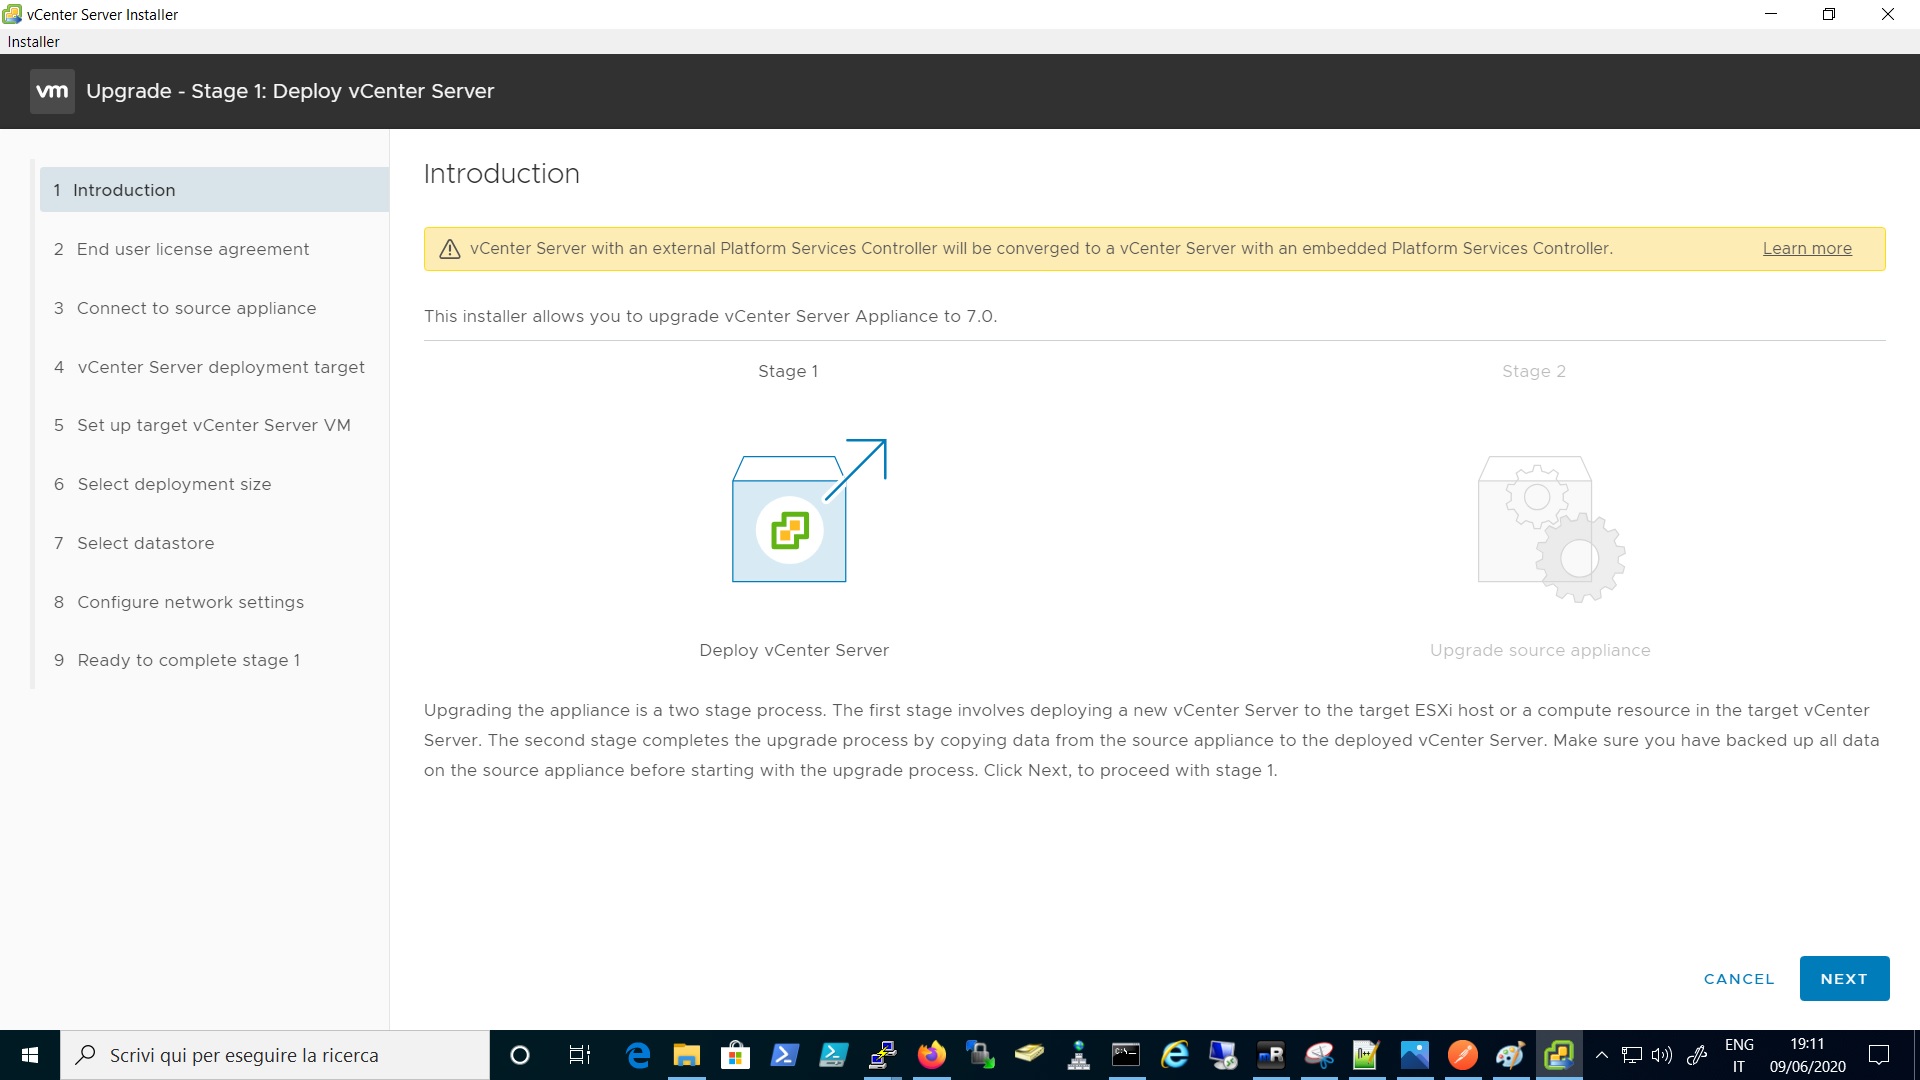
Click on Next on the intoduction page
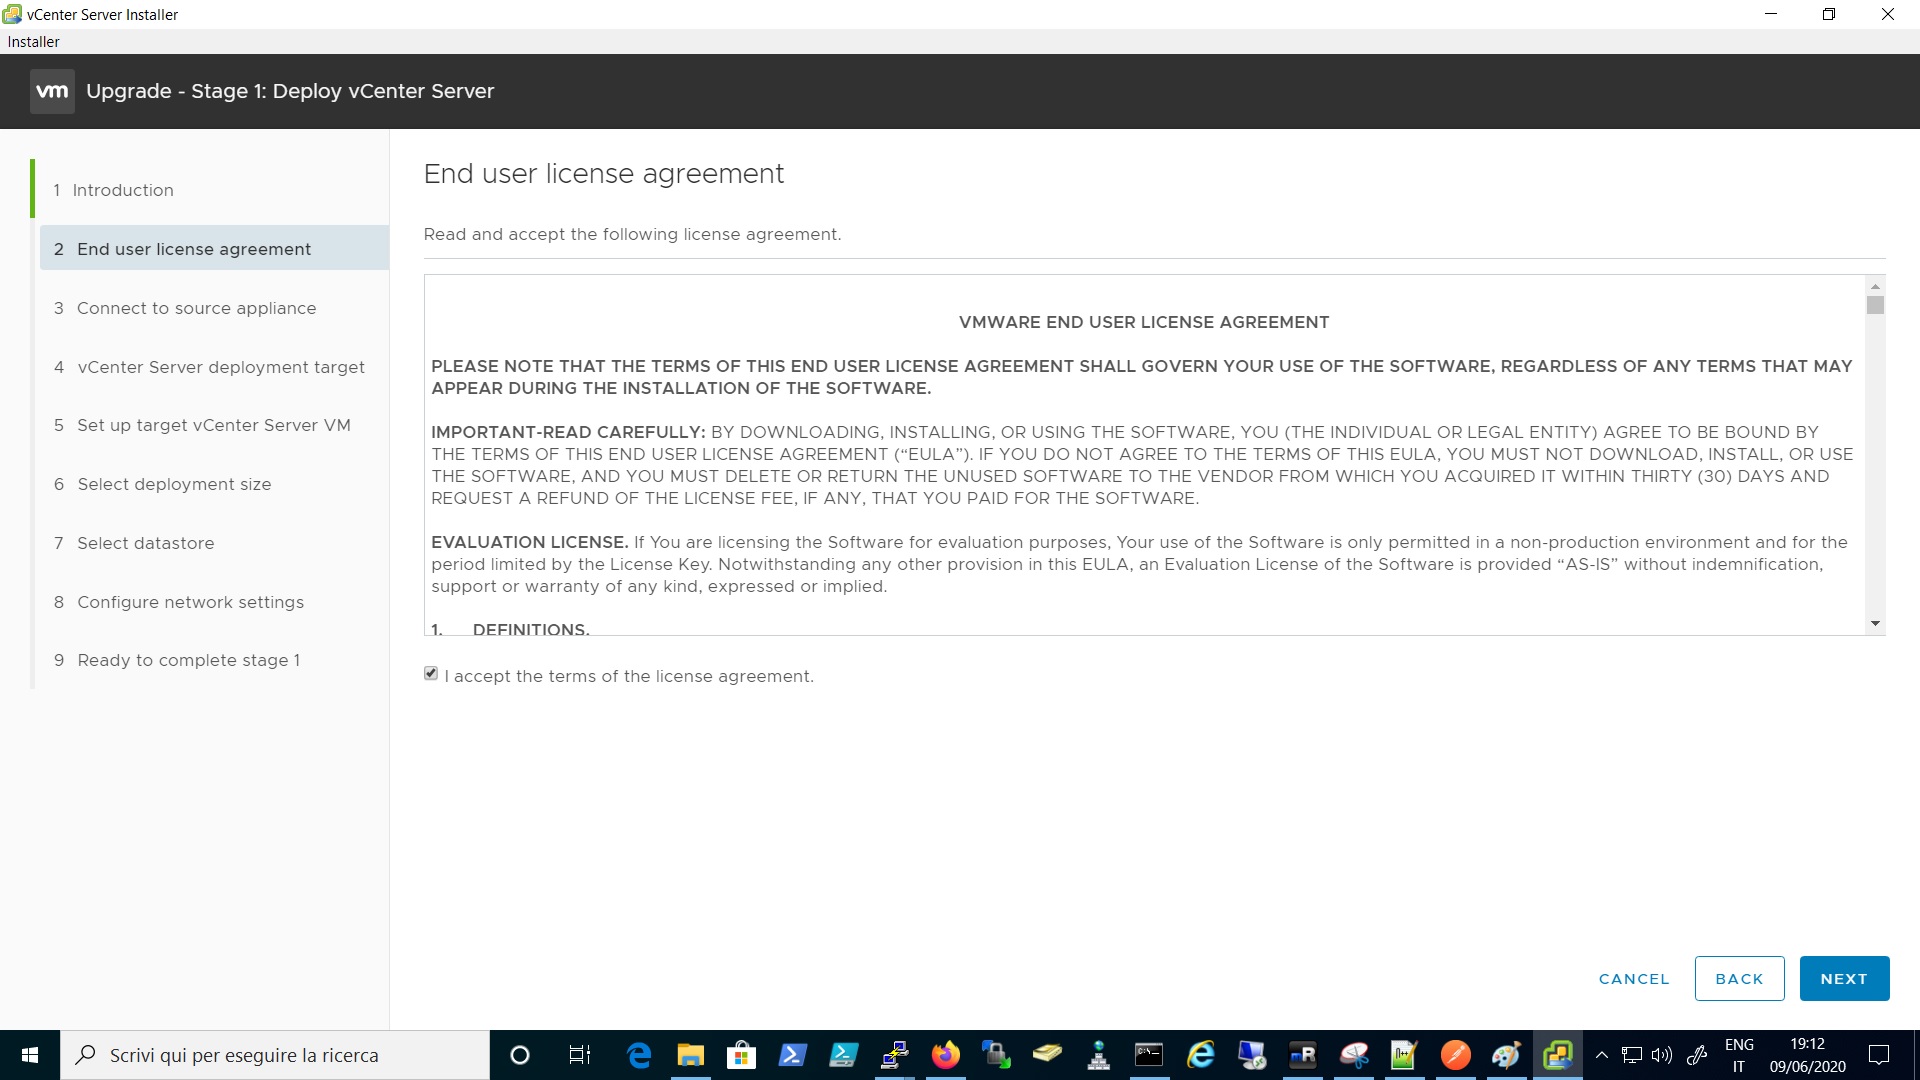
Accept the EULA and click on next
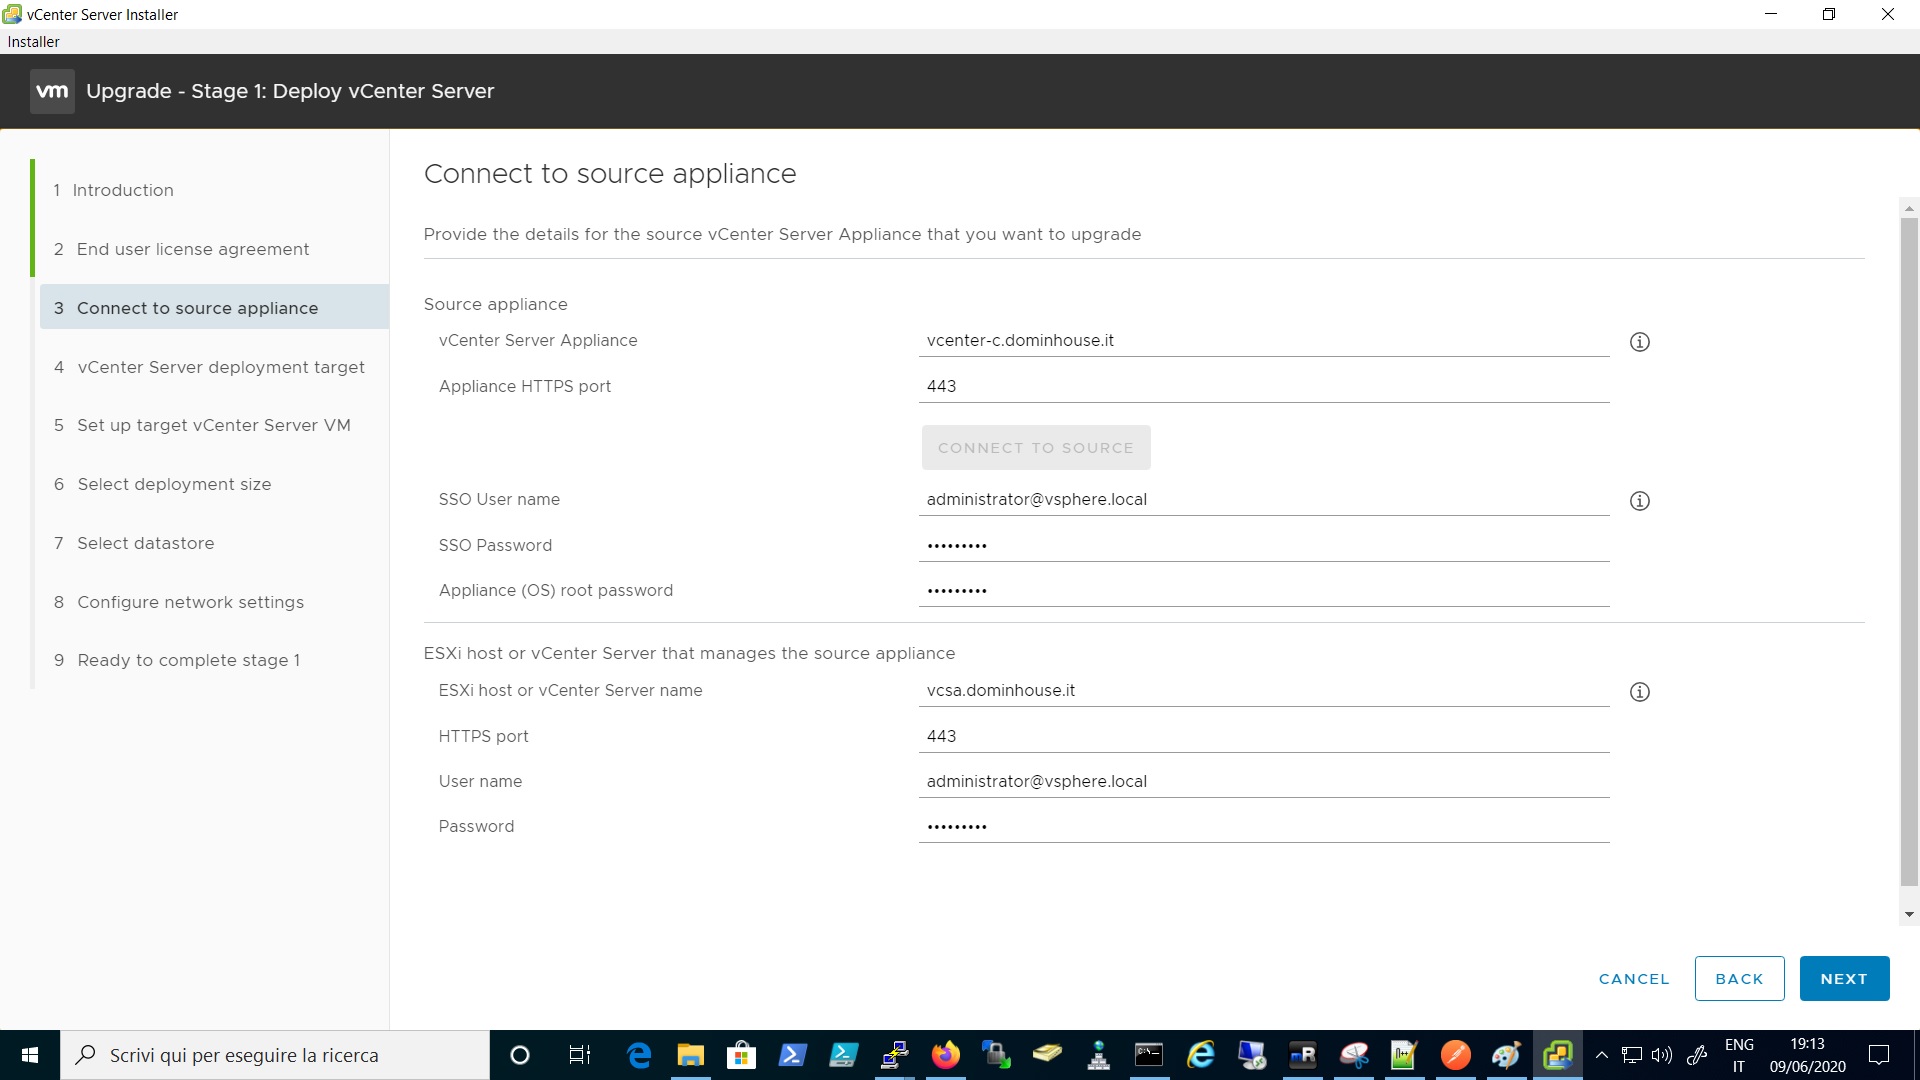
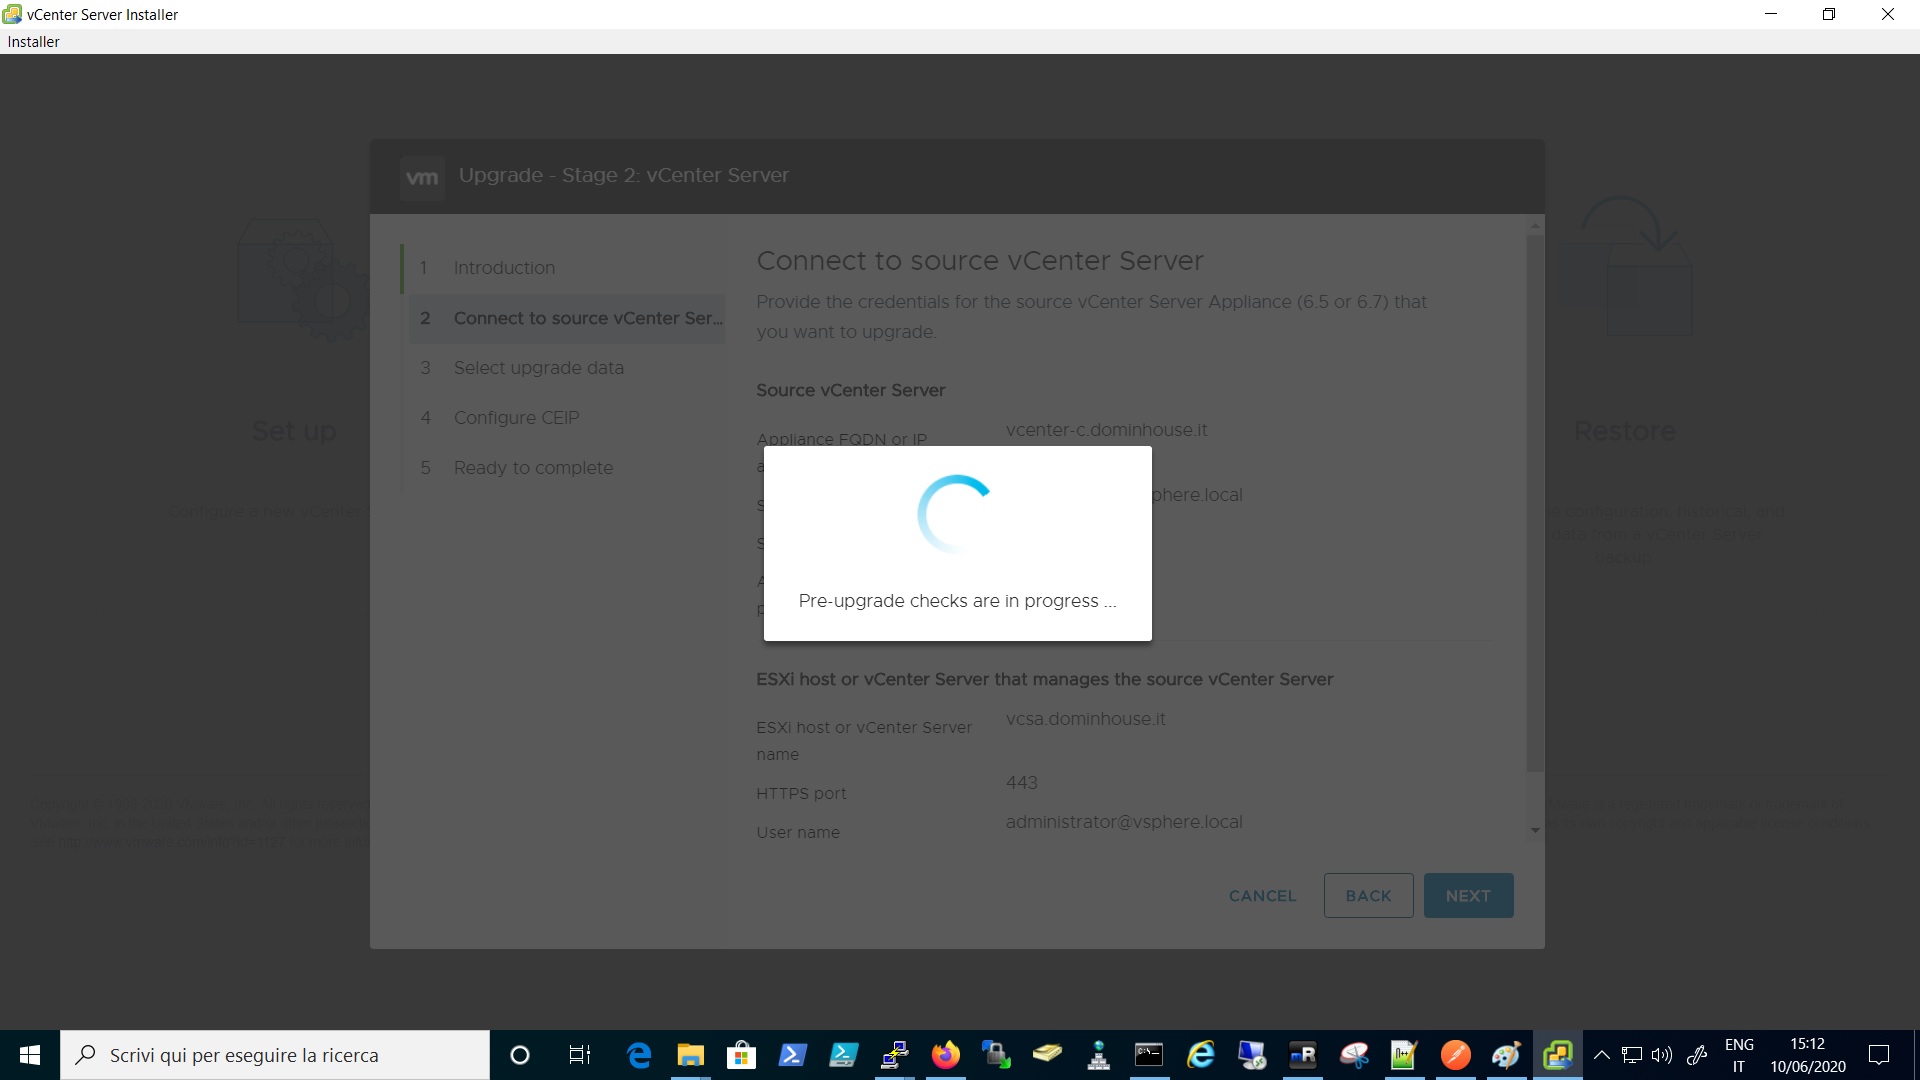
Review the information regarding the source vCenter and the ESXI or Center that manages the appliance
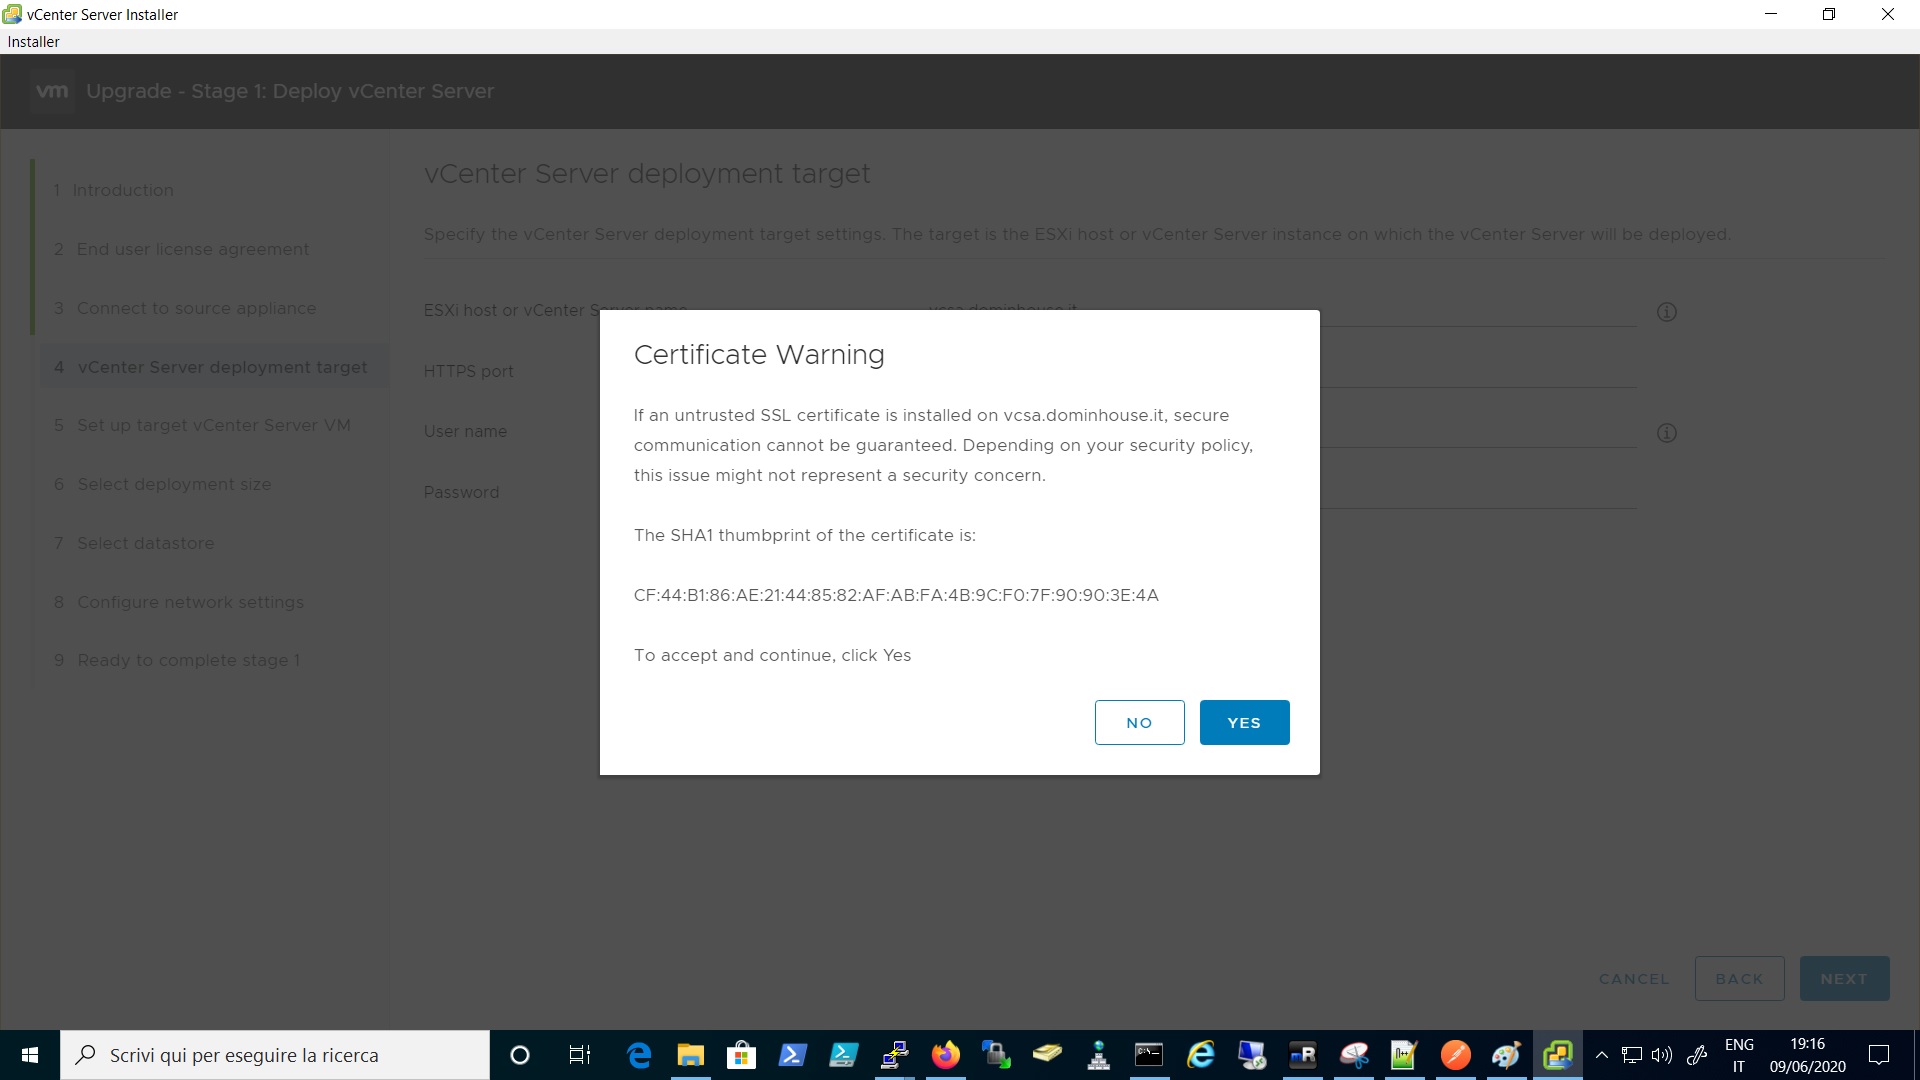
Click on “YES” on the certificate warning

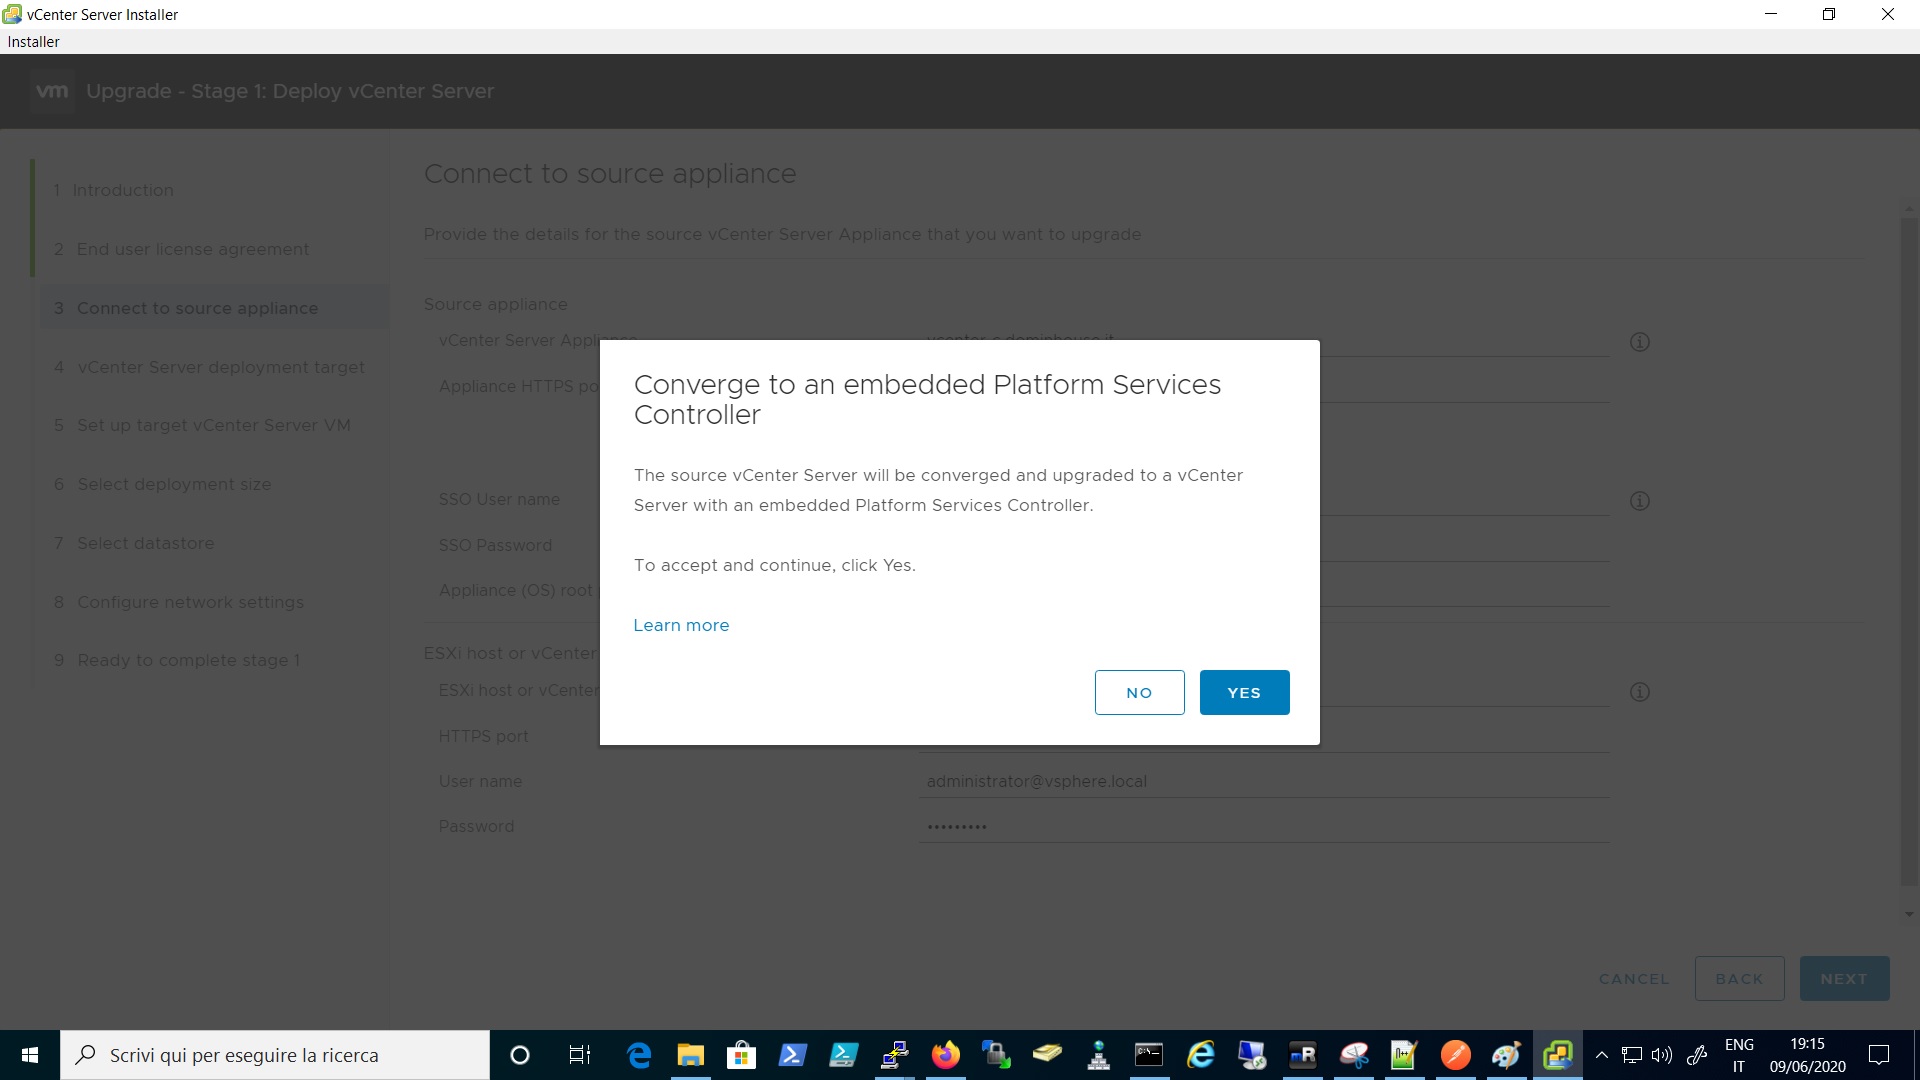
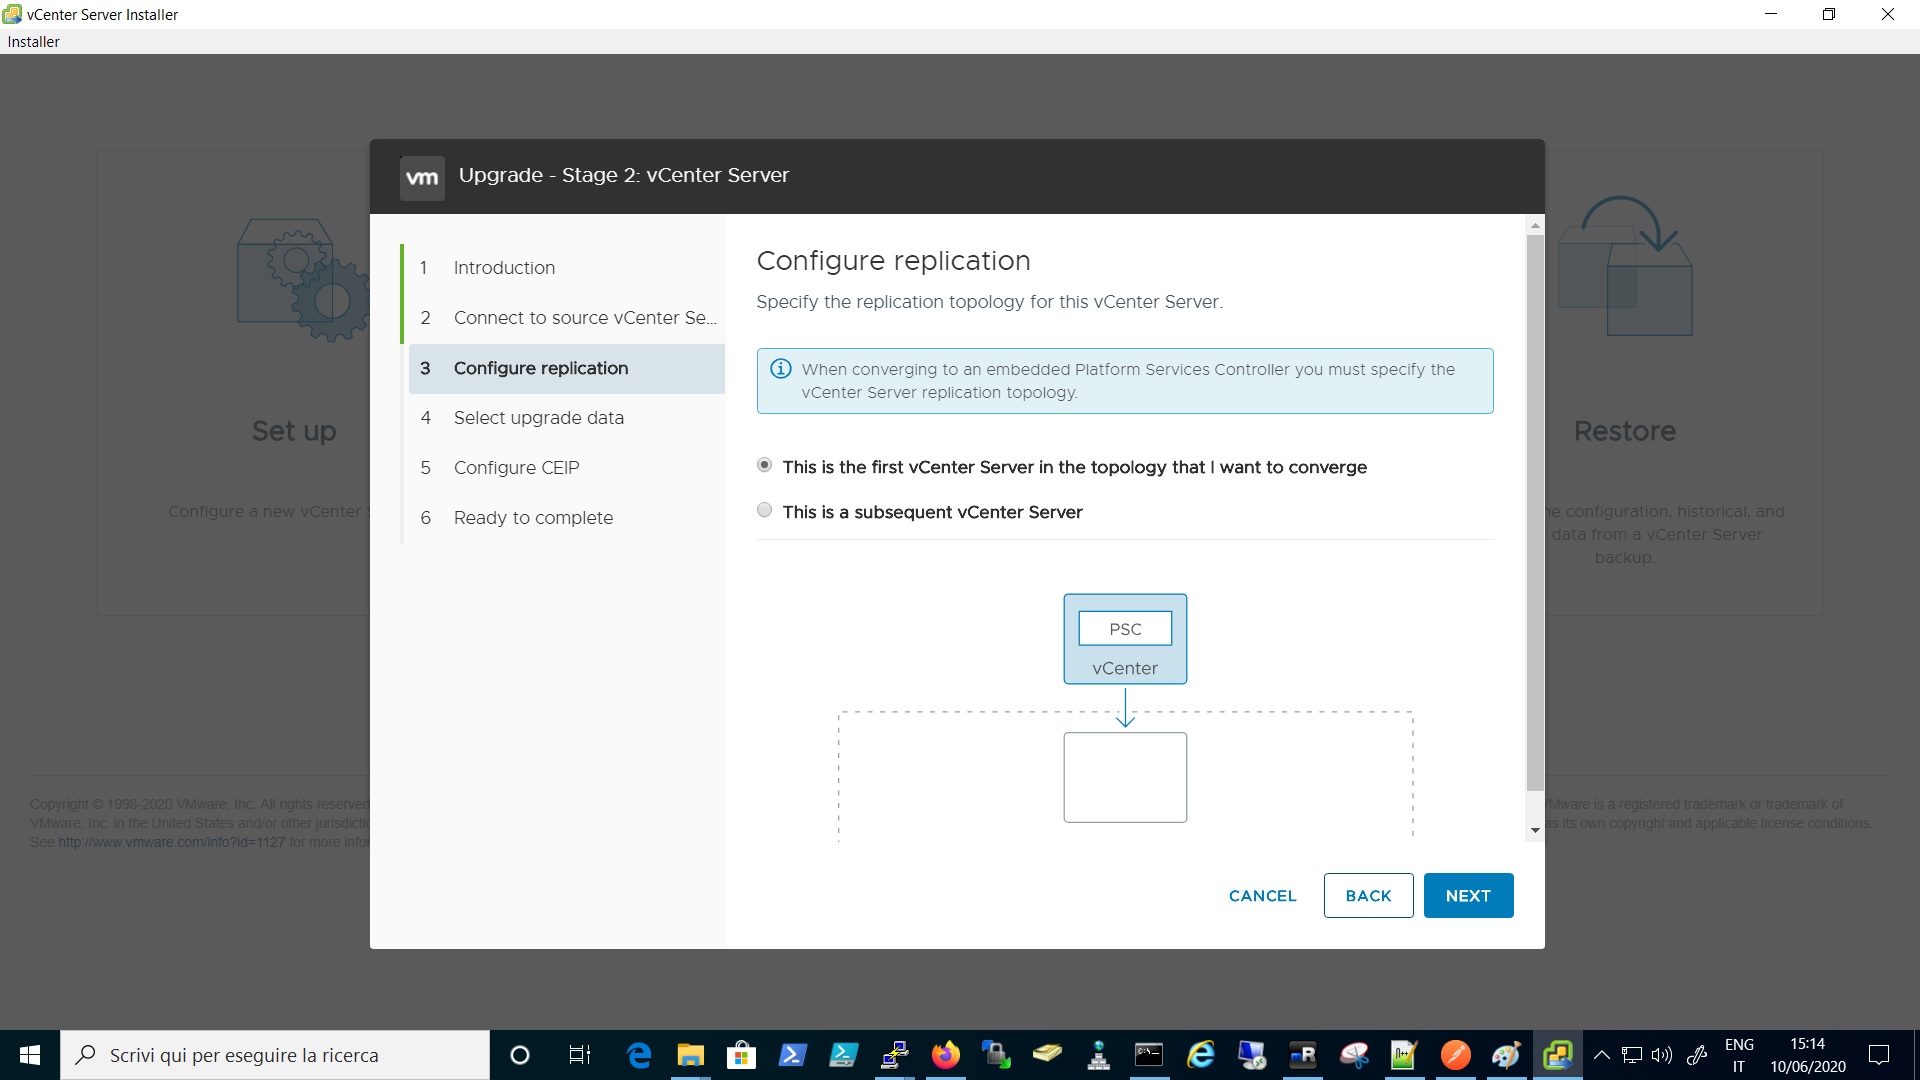
Accept the Convergence Process by clicking on YES
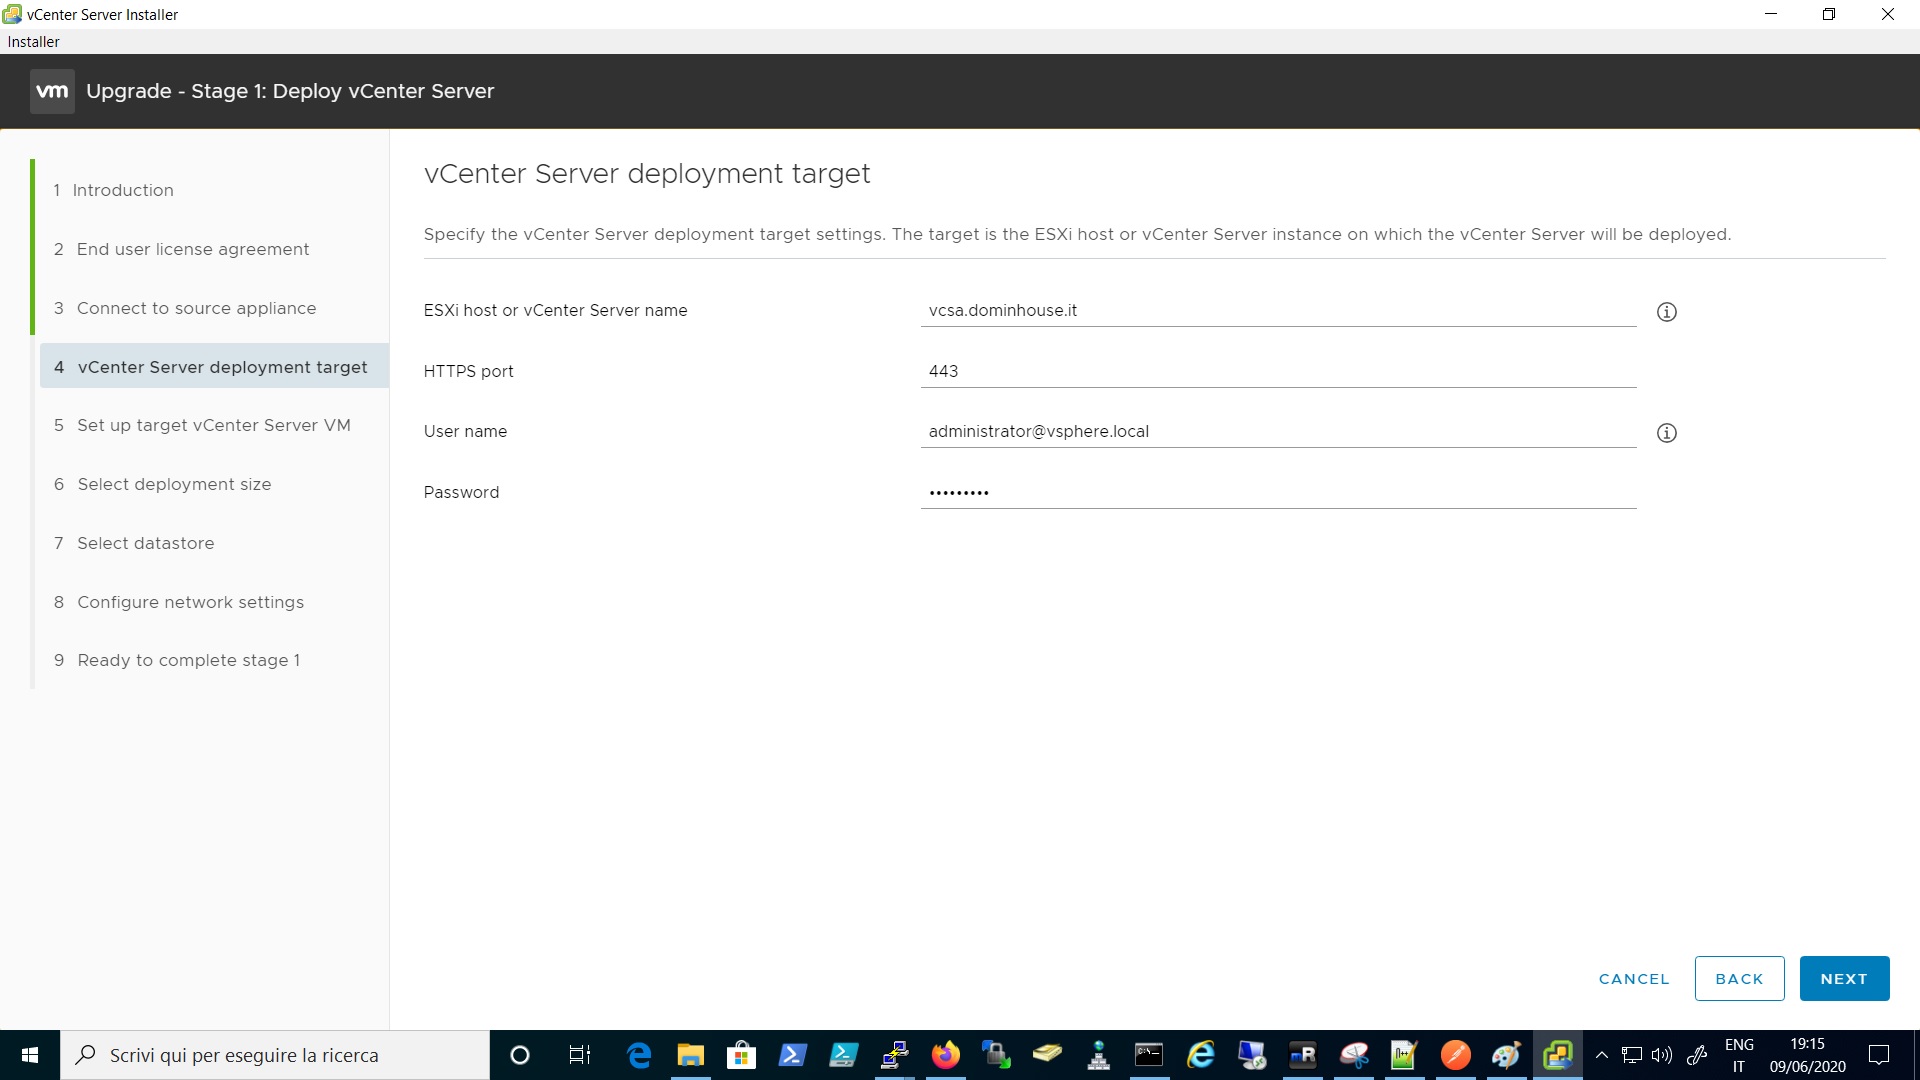
Insert the information regarding the target settings, ESXi or vCenter instance where the appliance will be deployed
Accept the Certificate Warning
Select the folder from the target inventory

Select the compute node or cluster where the appliance will be deployed

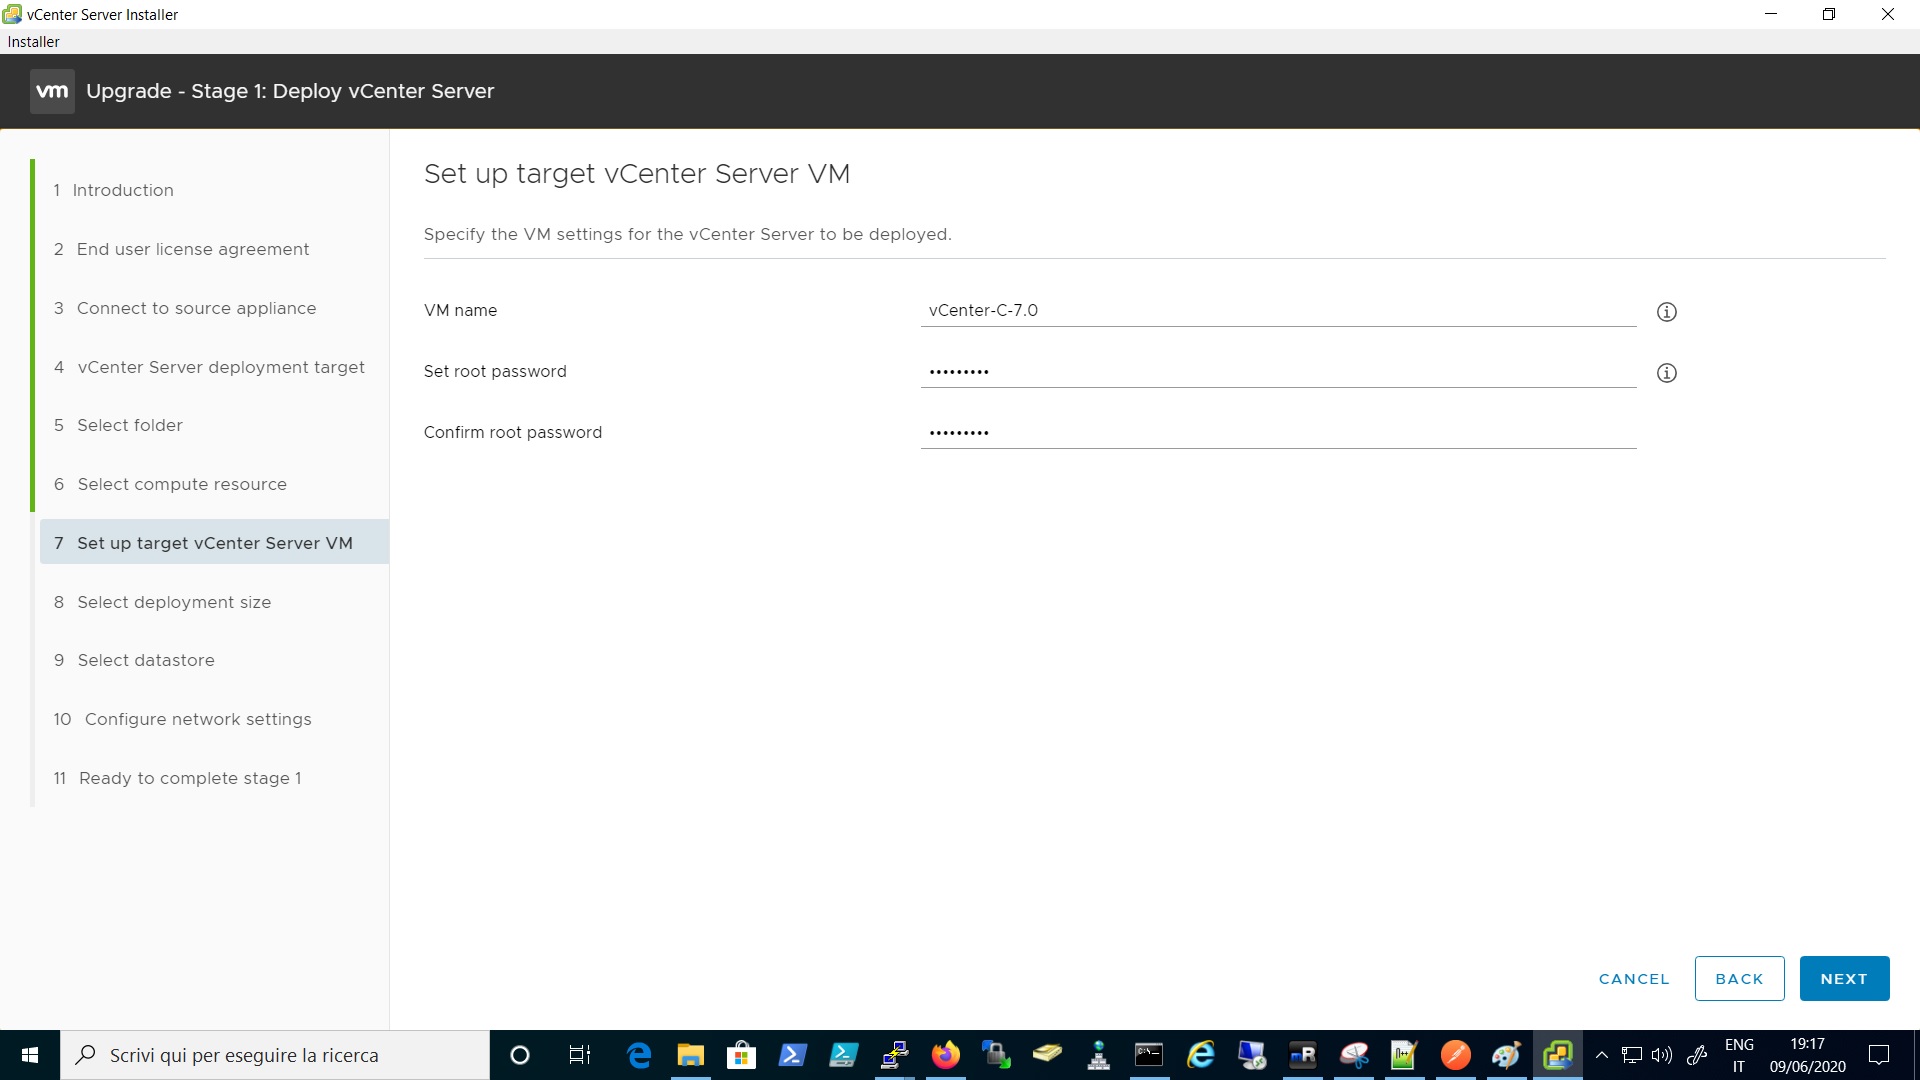
Set up the new appliance name and root password
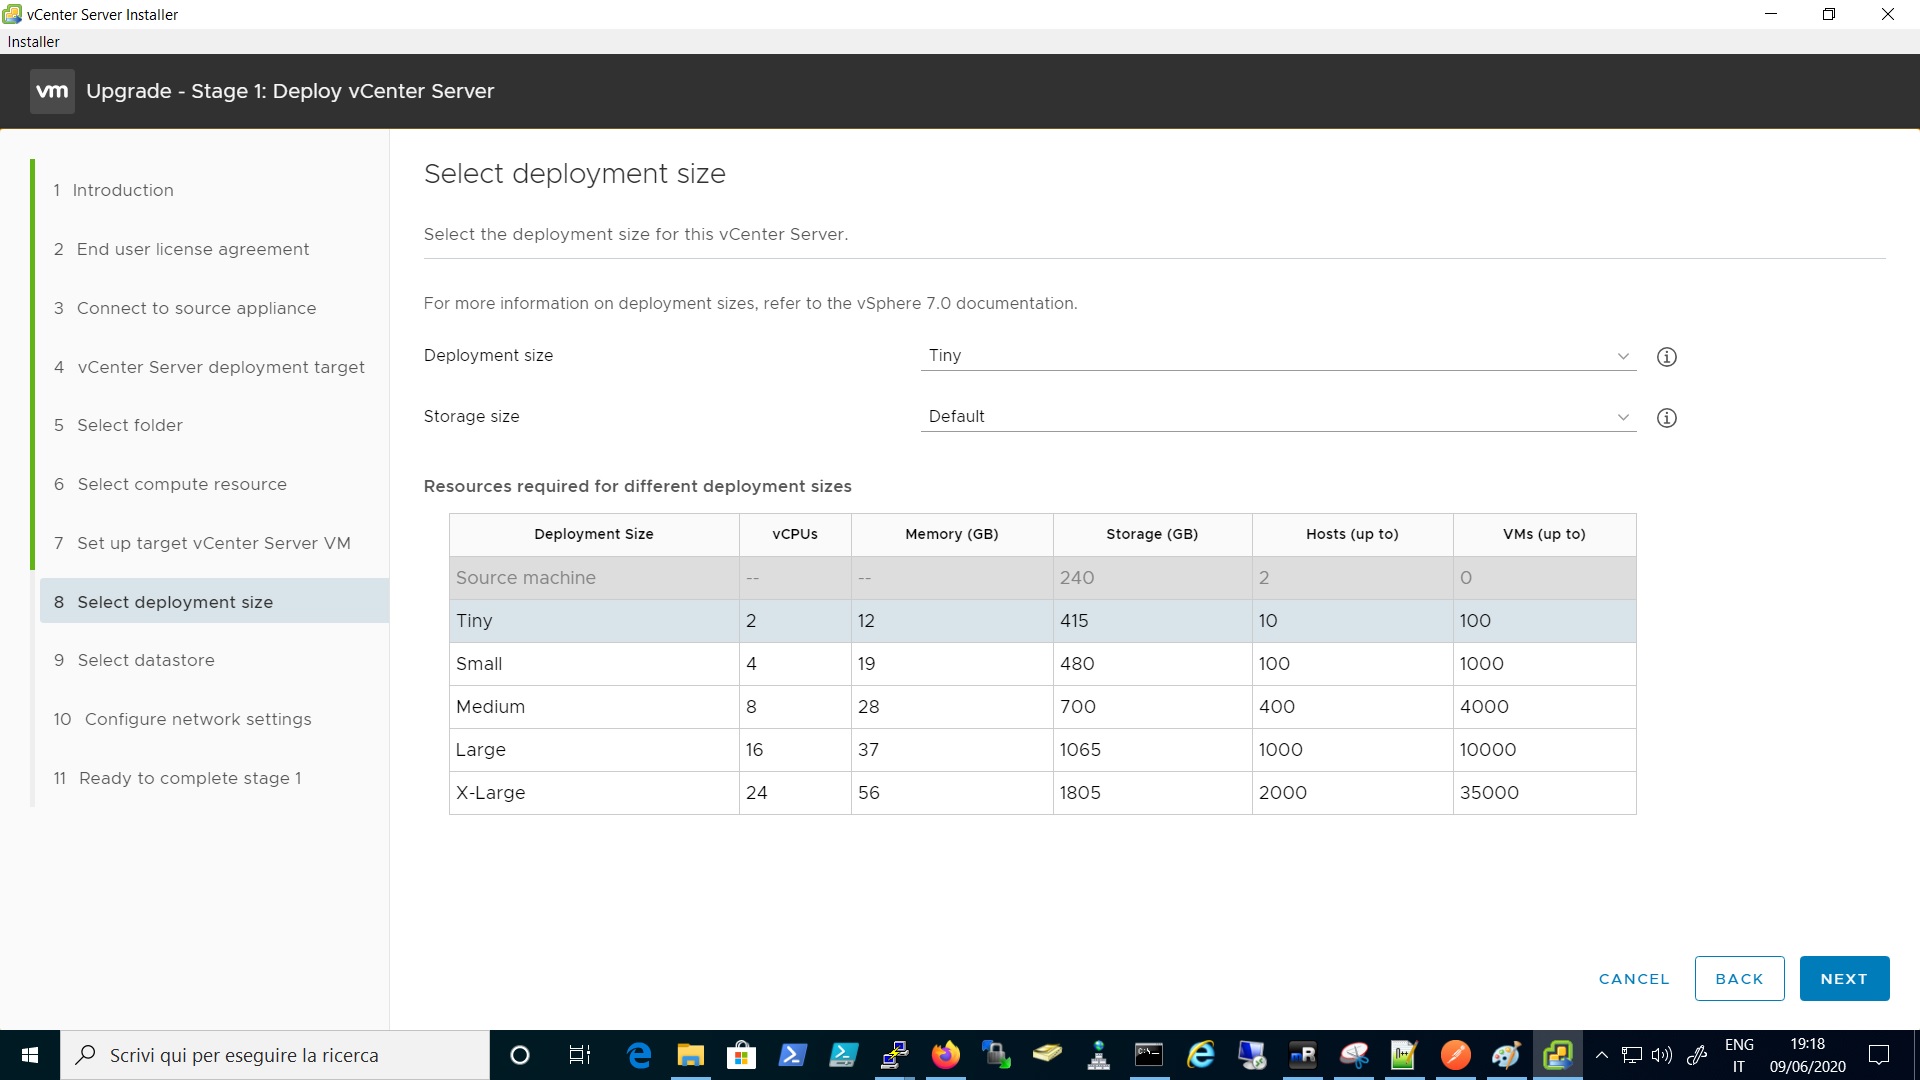
Select the size of the new vCenter appliance in relation to the number of Hosts and VMs managed
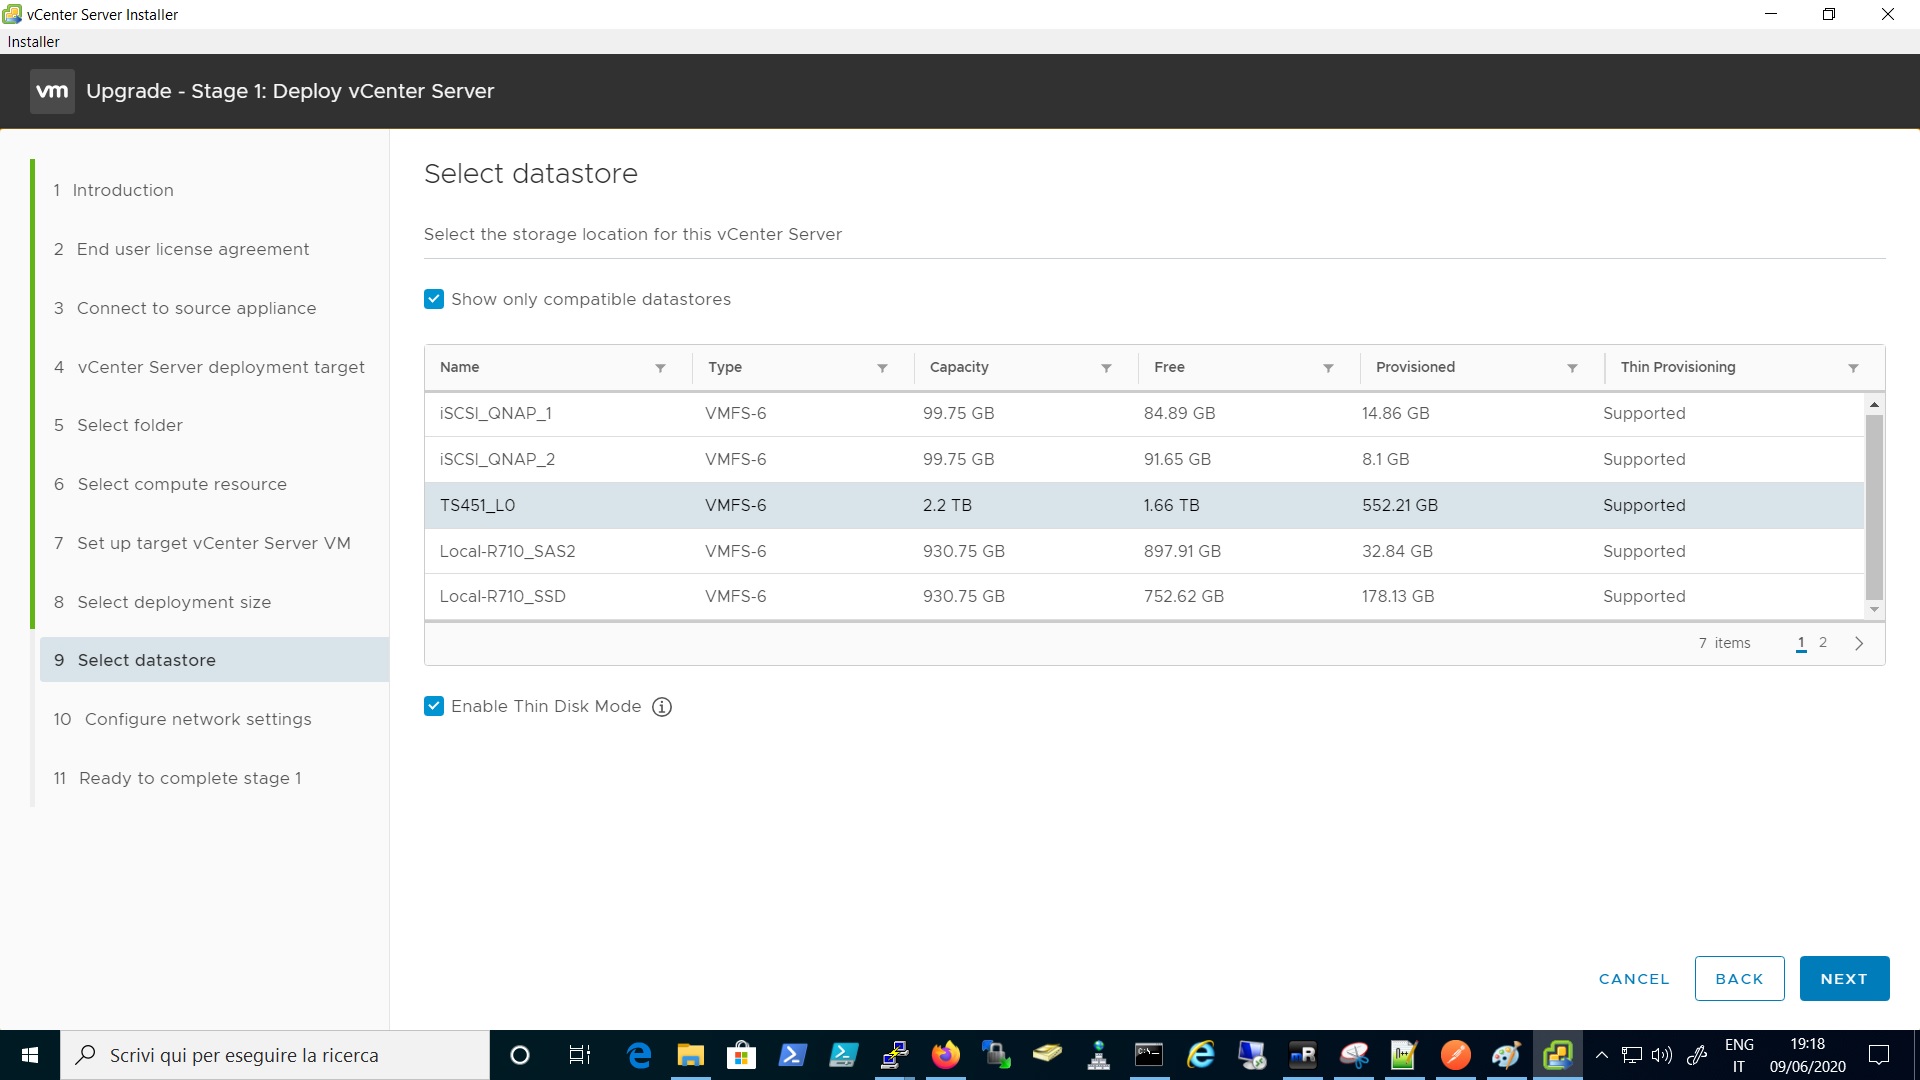
Select the datastore
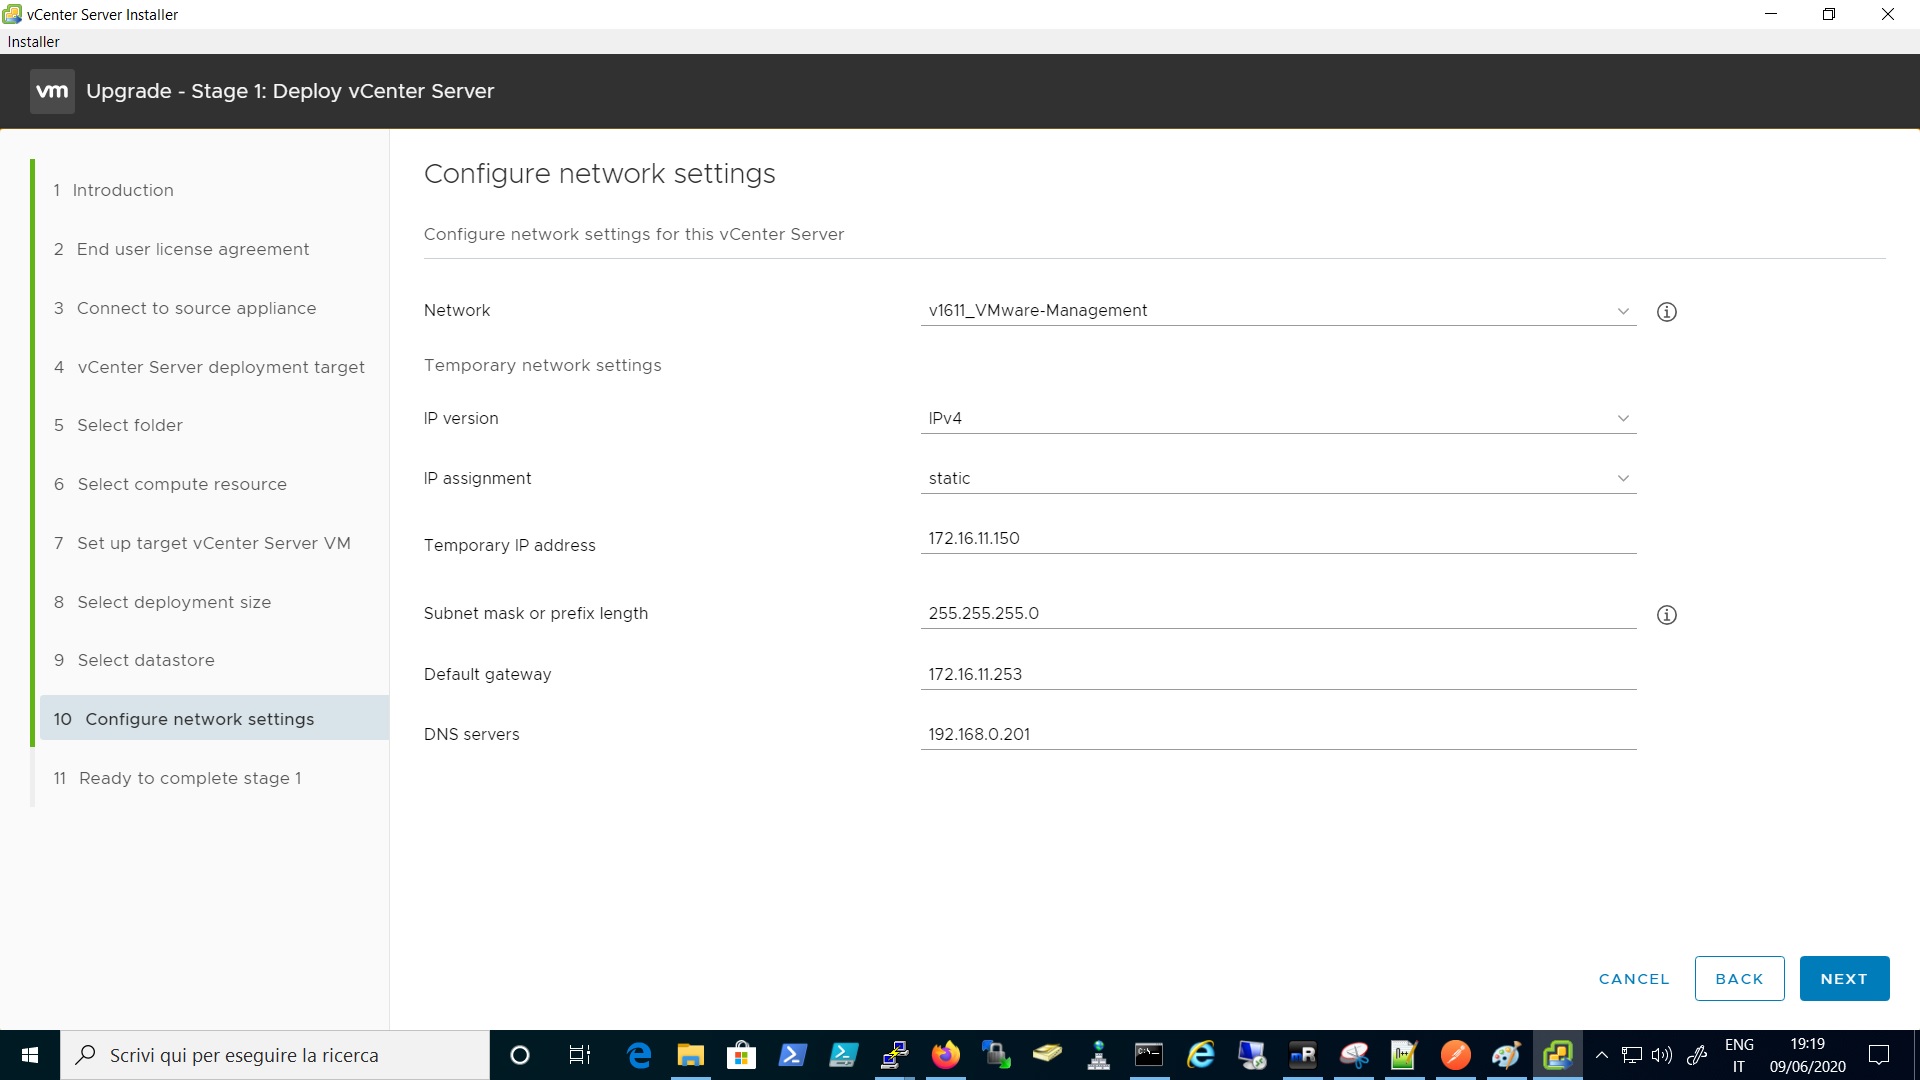
Insert all the needed data:
- Network Port Group
- Temporary IP
- Netmask
- Gateway
- DNS Server
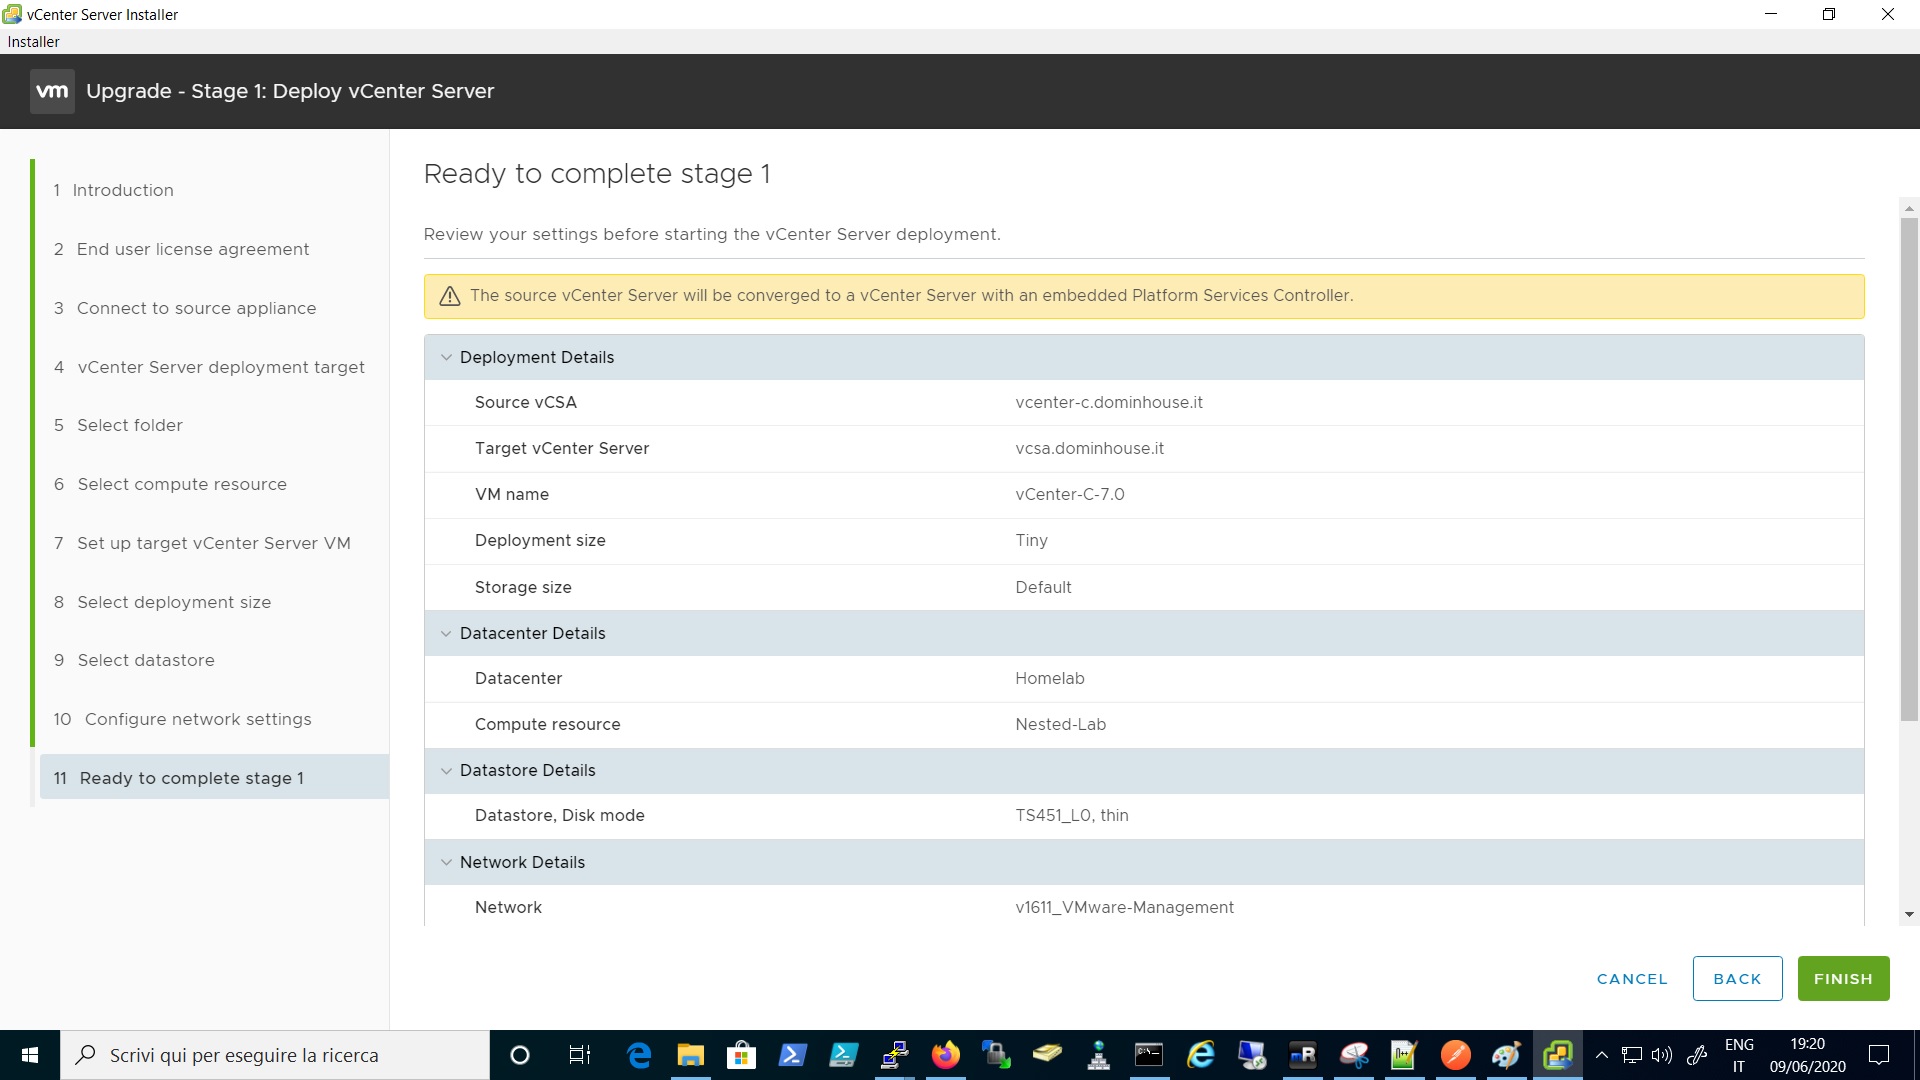
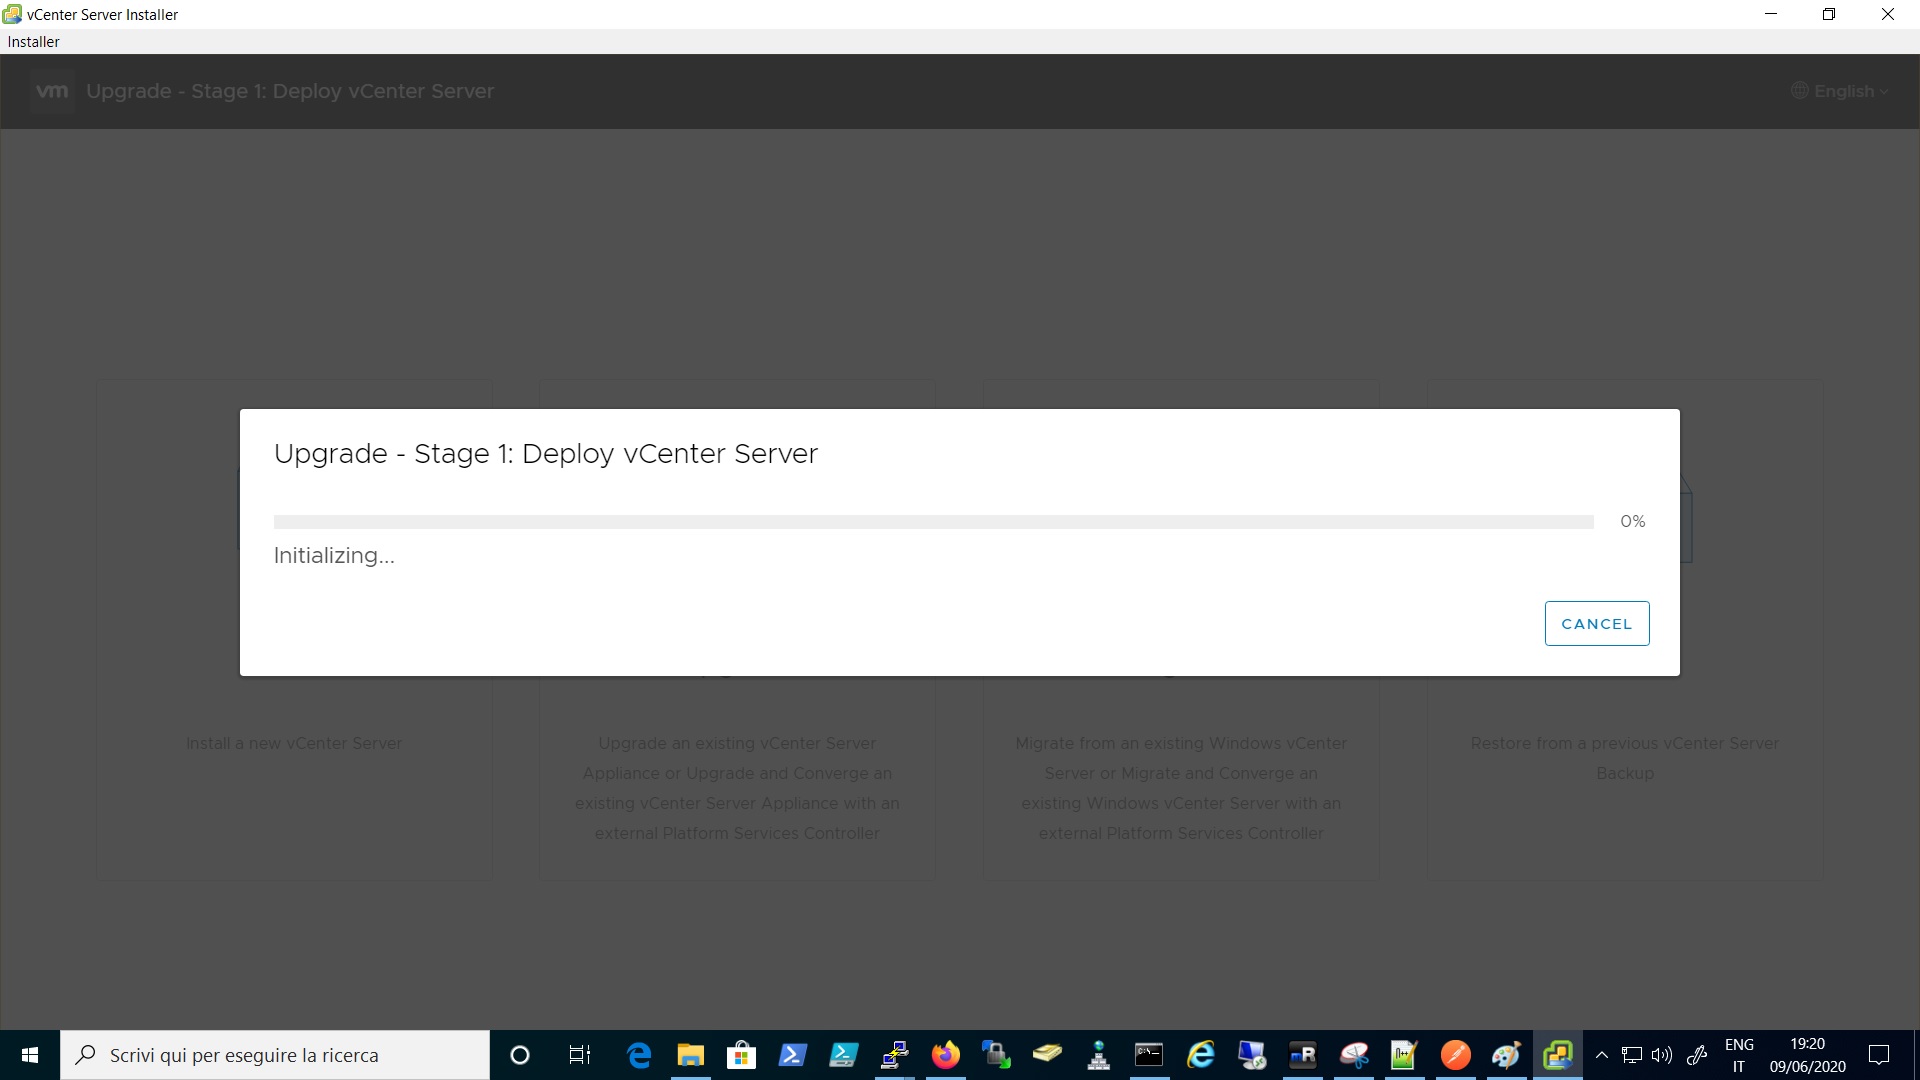
Review all the information and if everything is okay, click on finish to start the deploy.
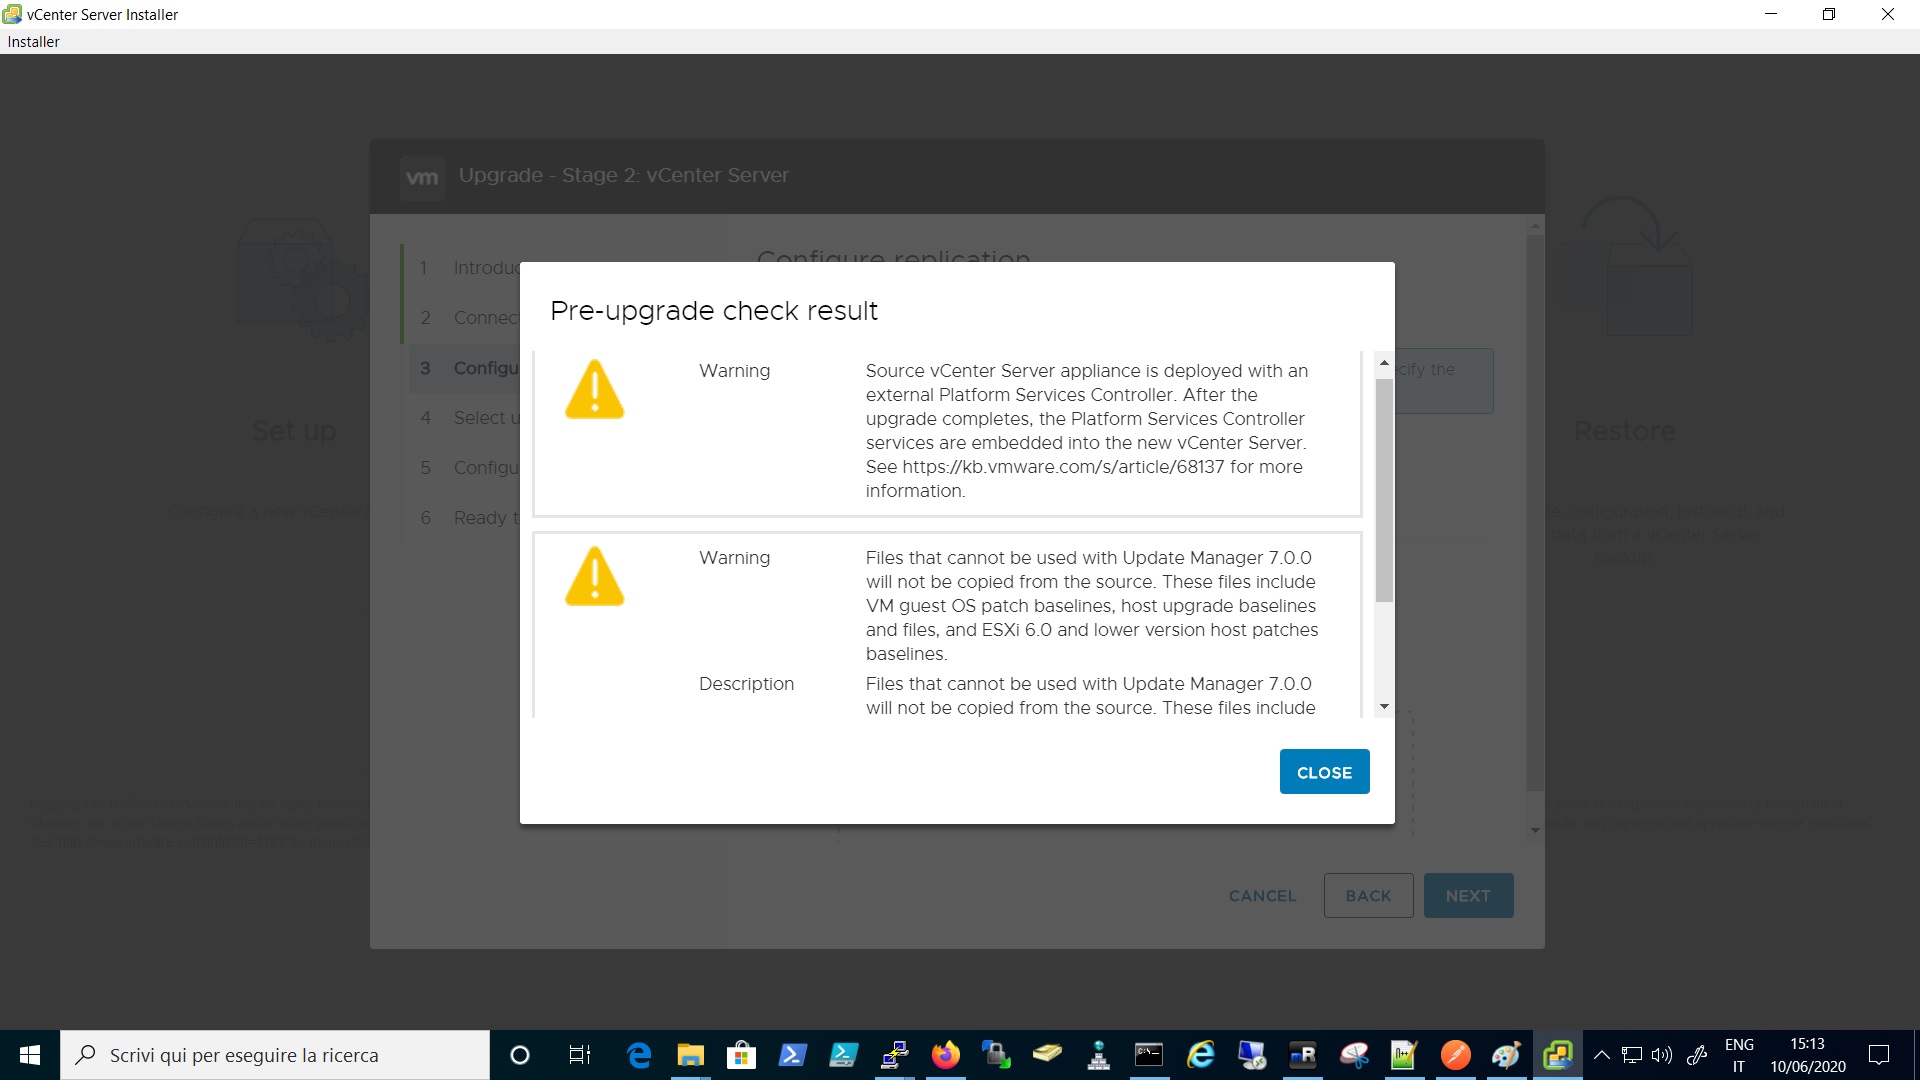
Go thought the wizard to arrive to the pre-checking steps, if you have a topology with an external PSC you will get some warning but don’t worry is normal, it’s just the Upgrade Process to 7.0 that warns you that during the Upgrade to 7 the new vCenter will have the vCenter with Embedded PSC, as I already written at the beginning of this article this is the only supported topology for 7.0
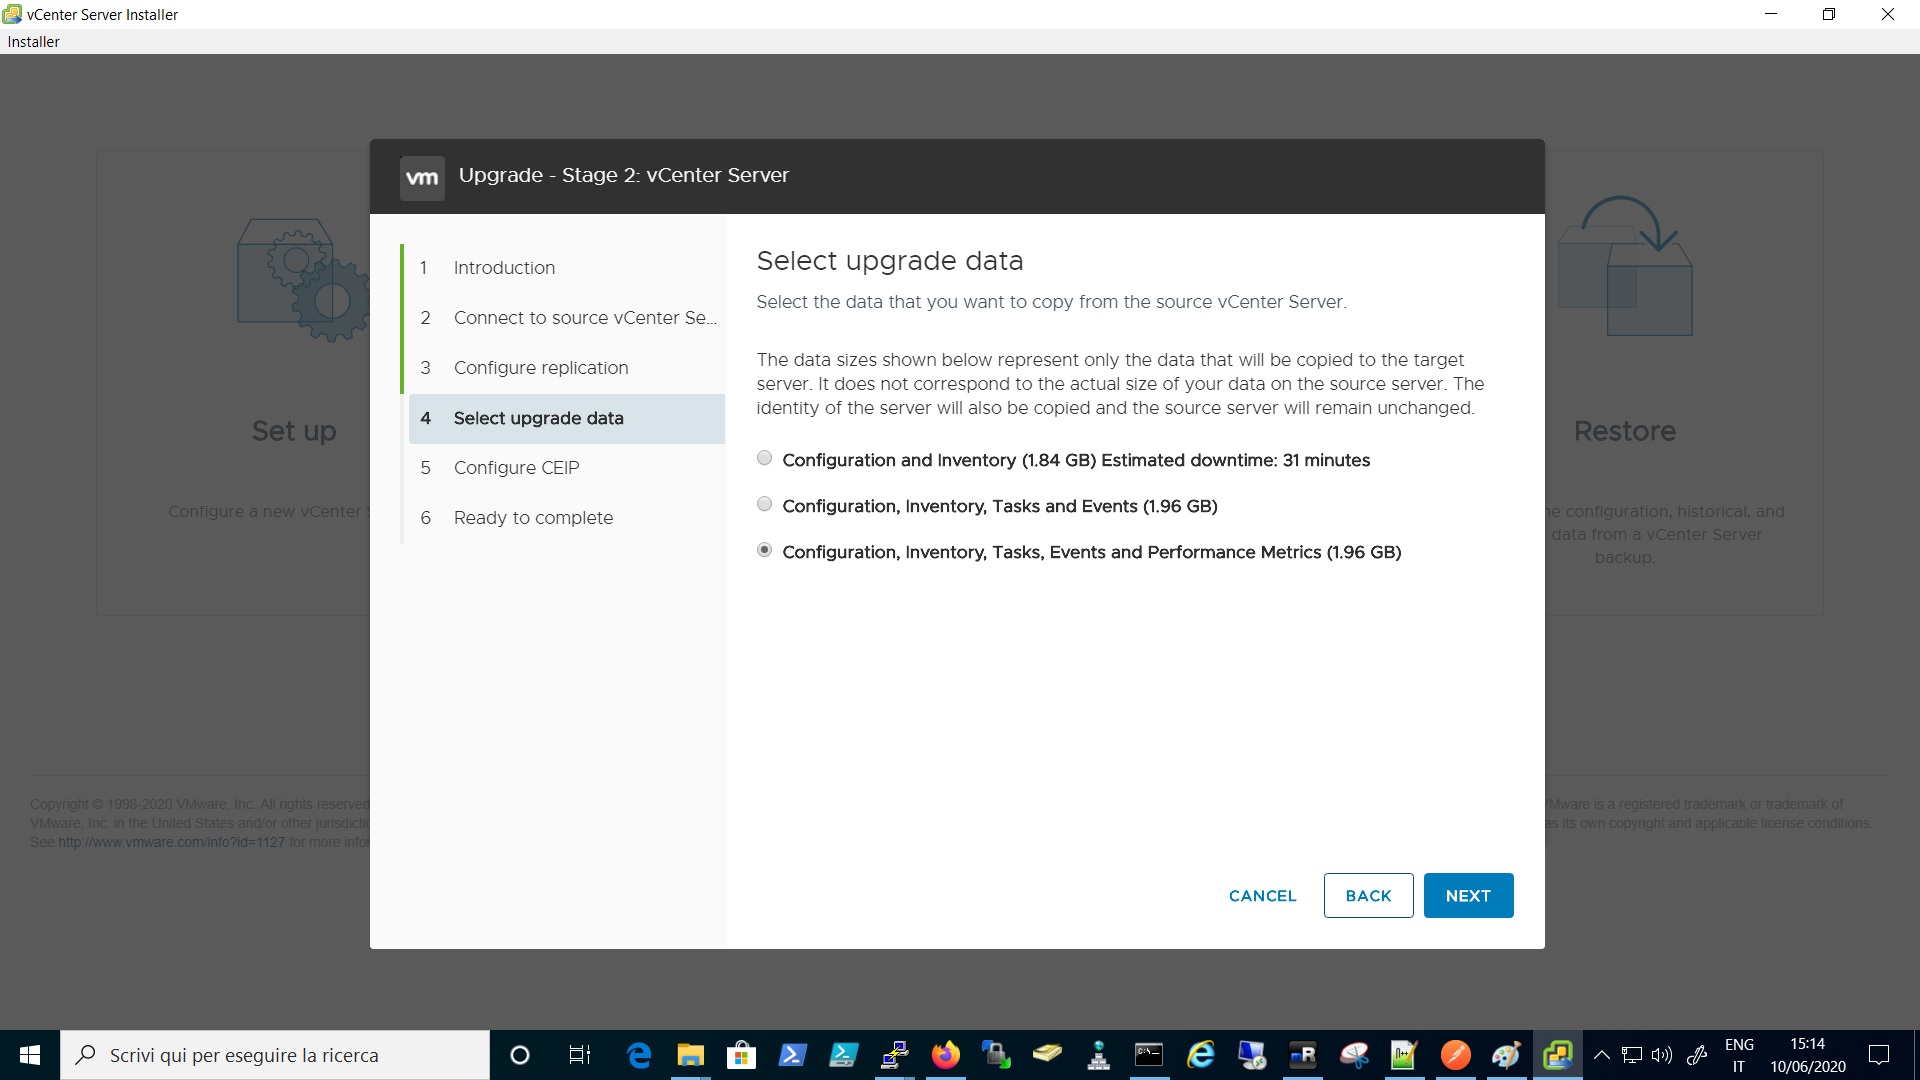
Select which data do you want to transfer to your new vCenter appliance, in my case I don’t have a lot of performance metris so I’ll choose the last option to trasfer everything

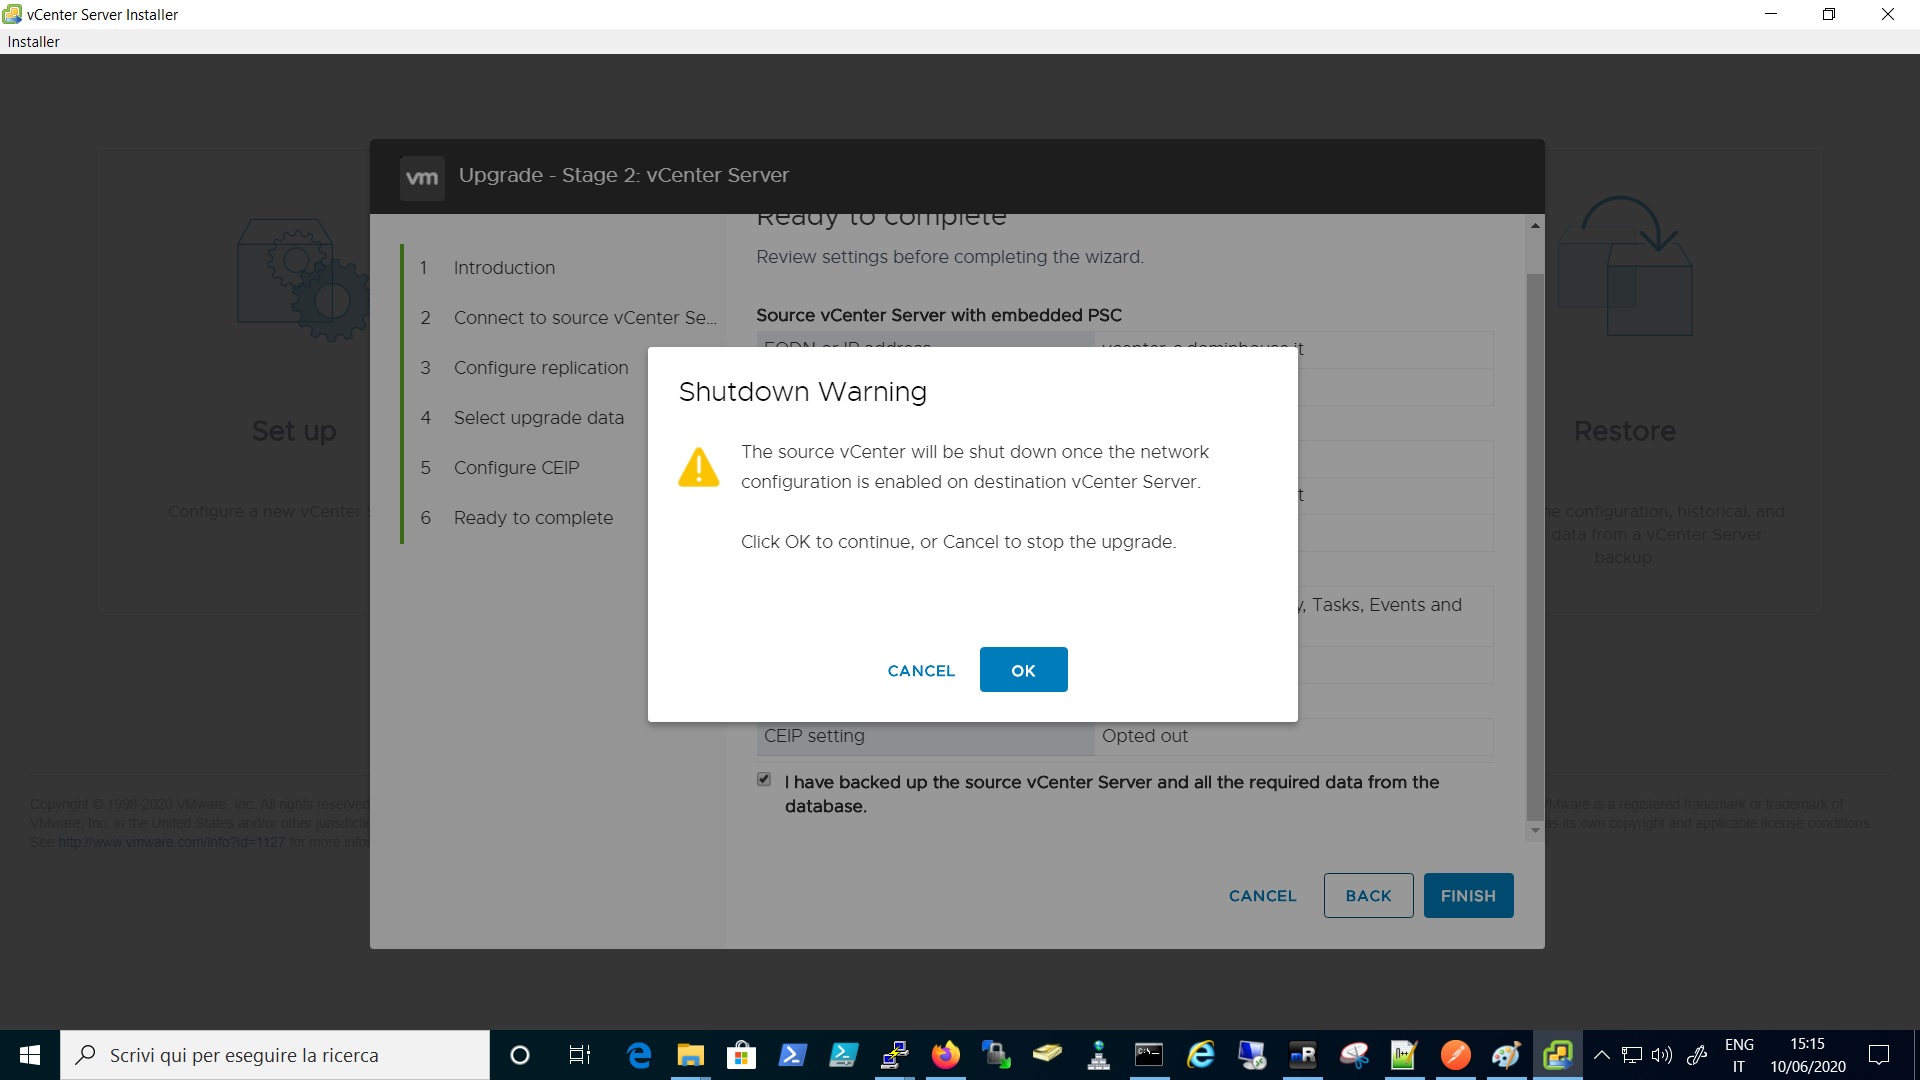
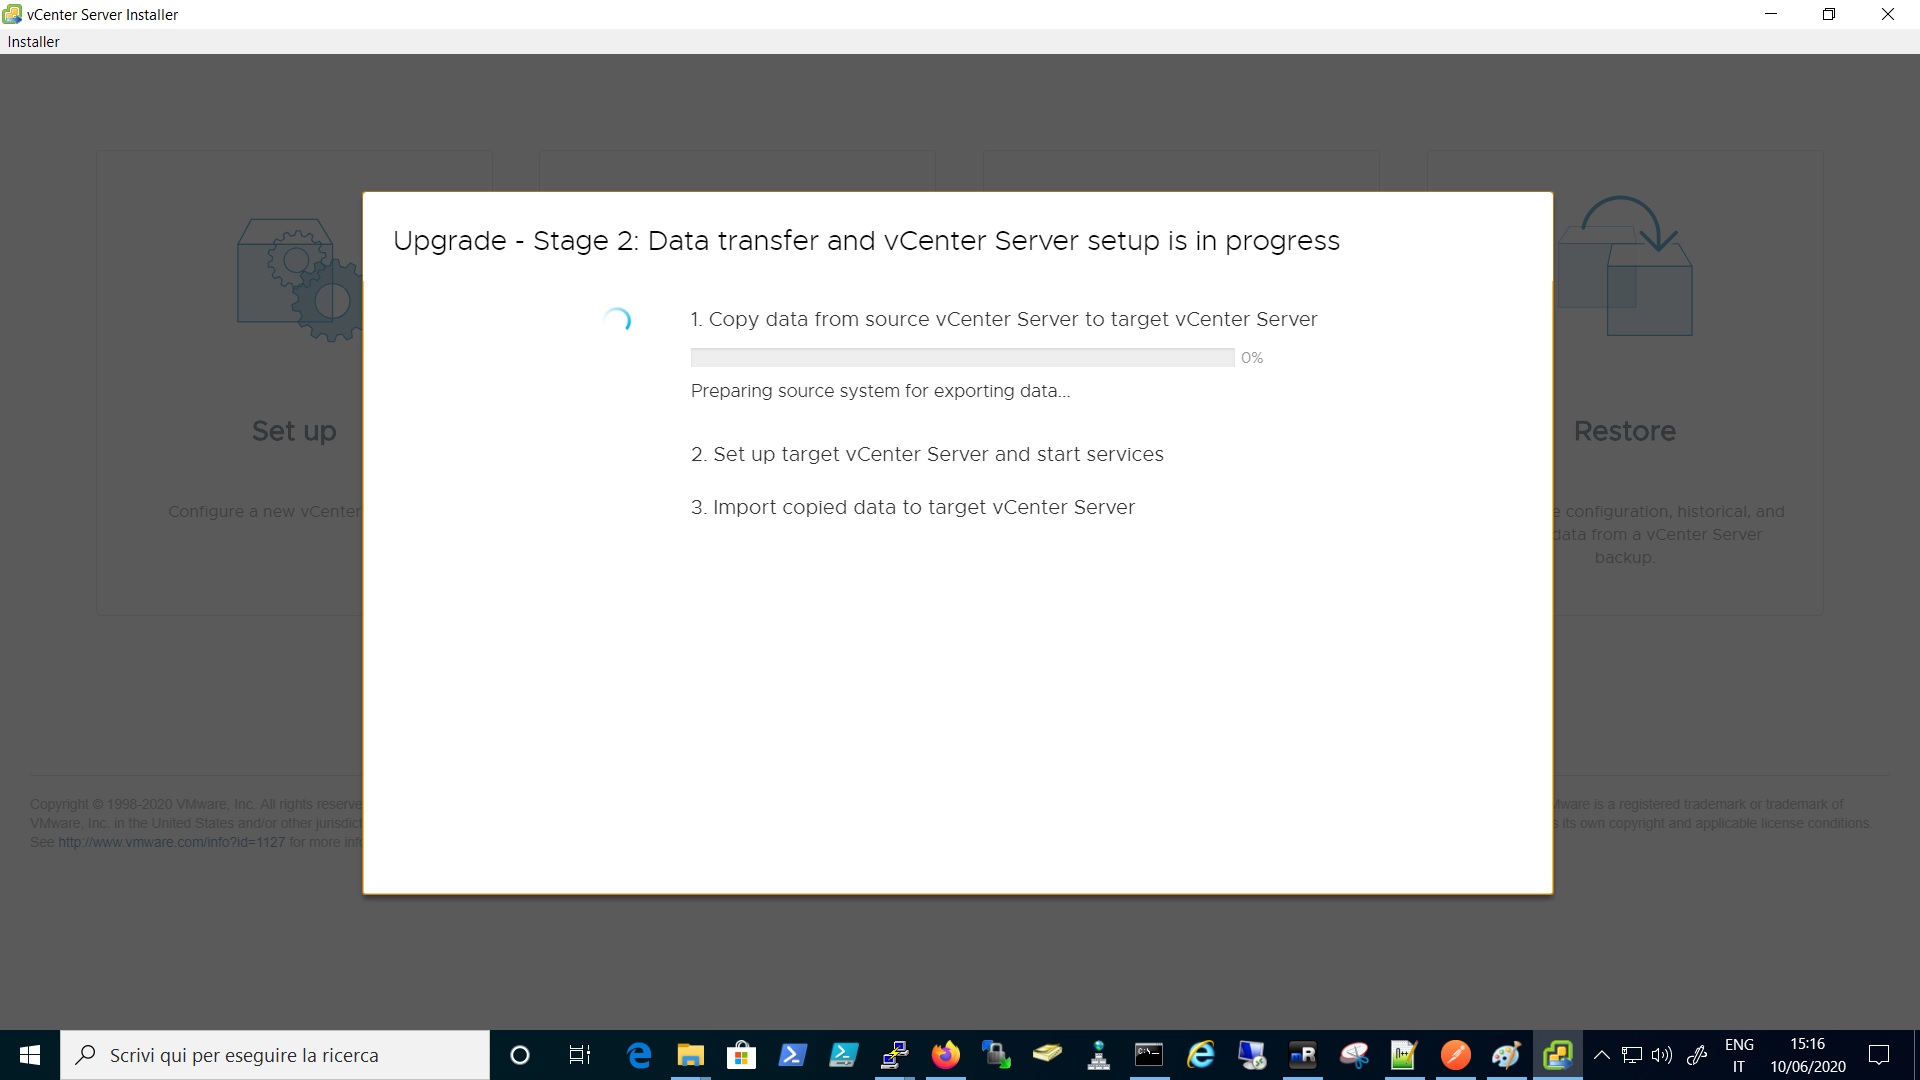
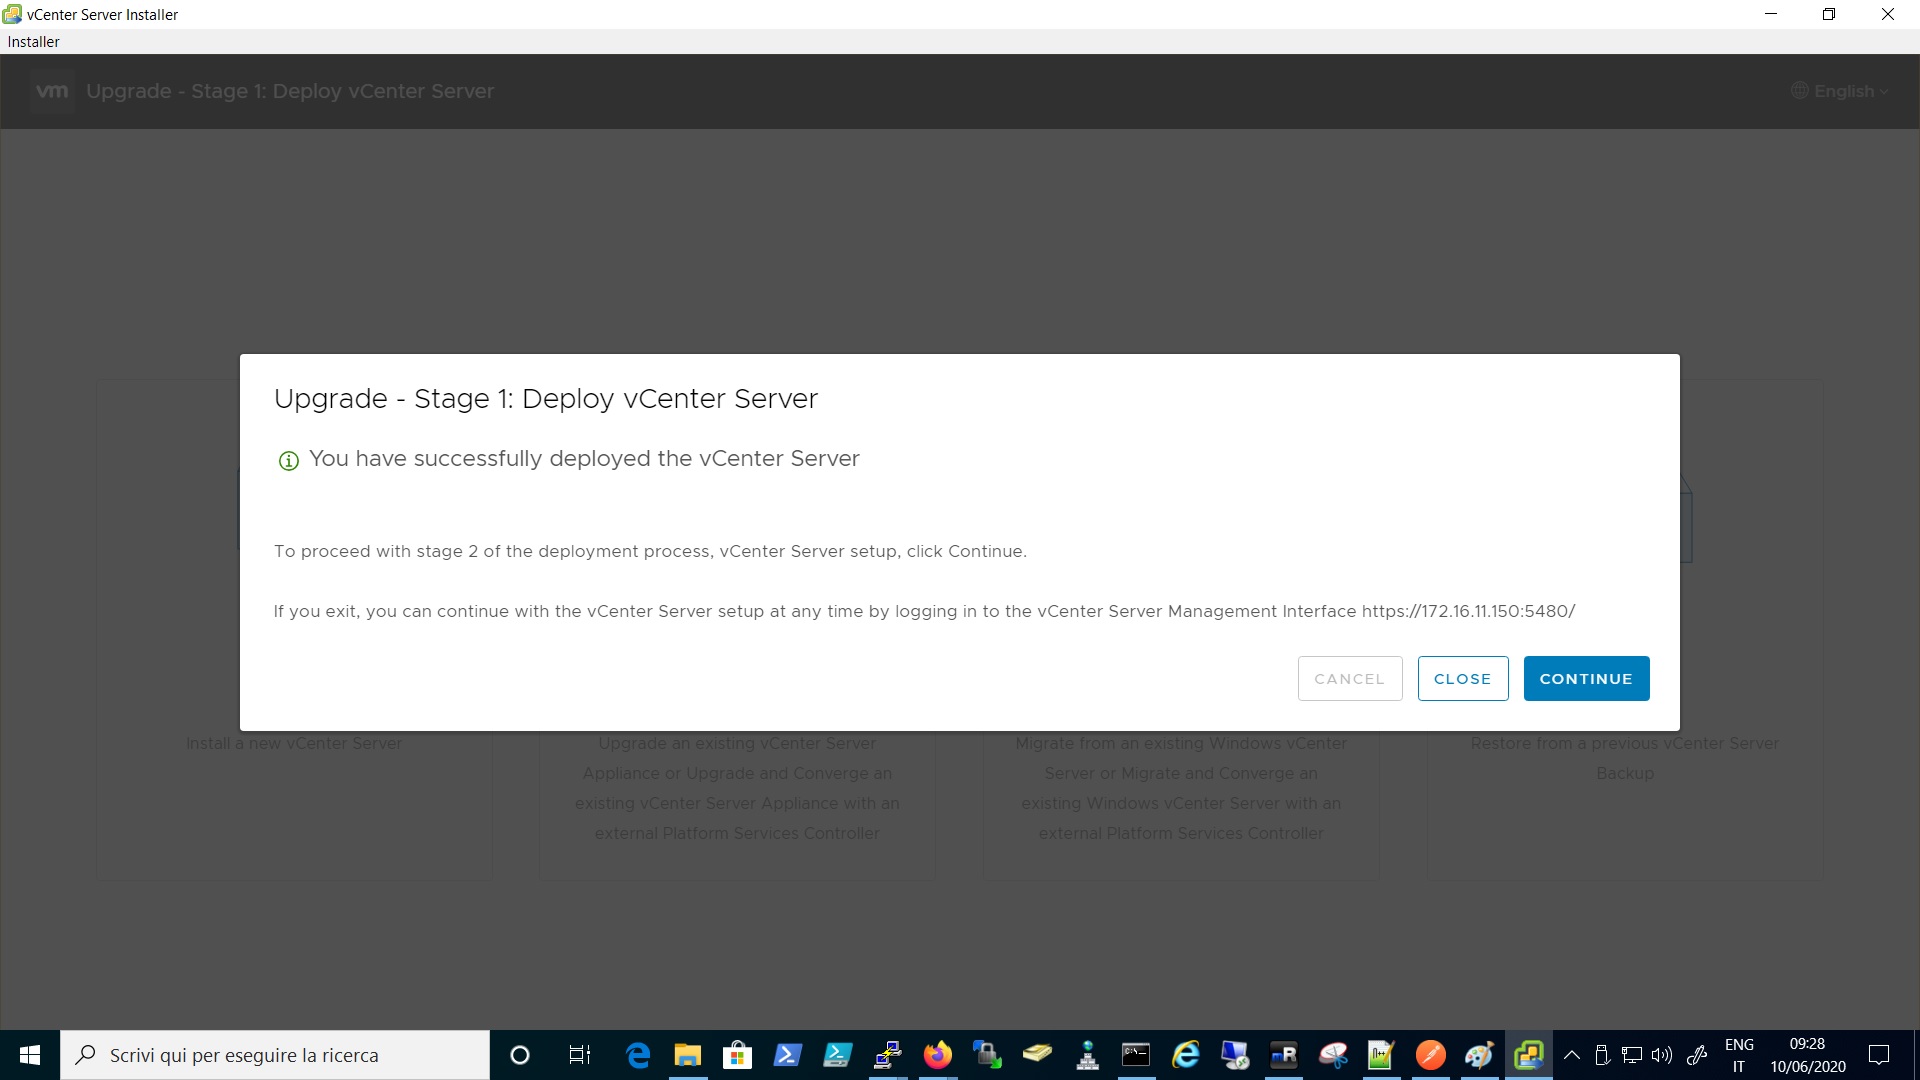
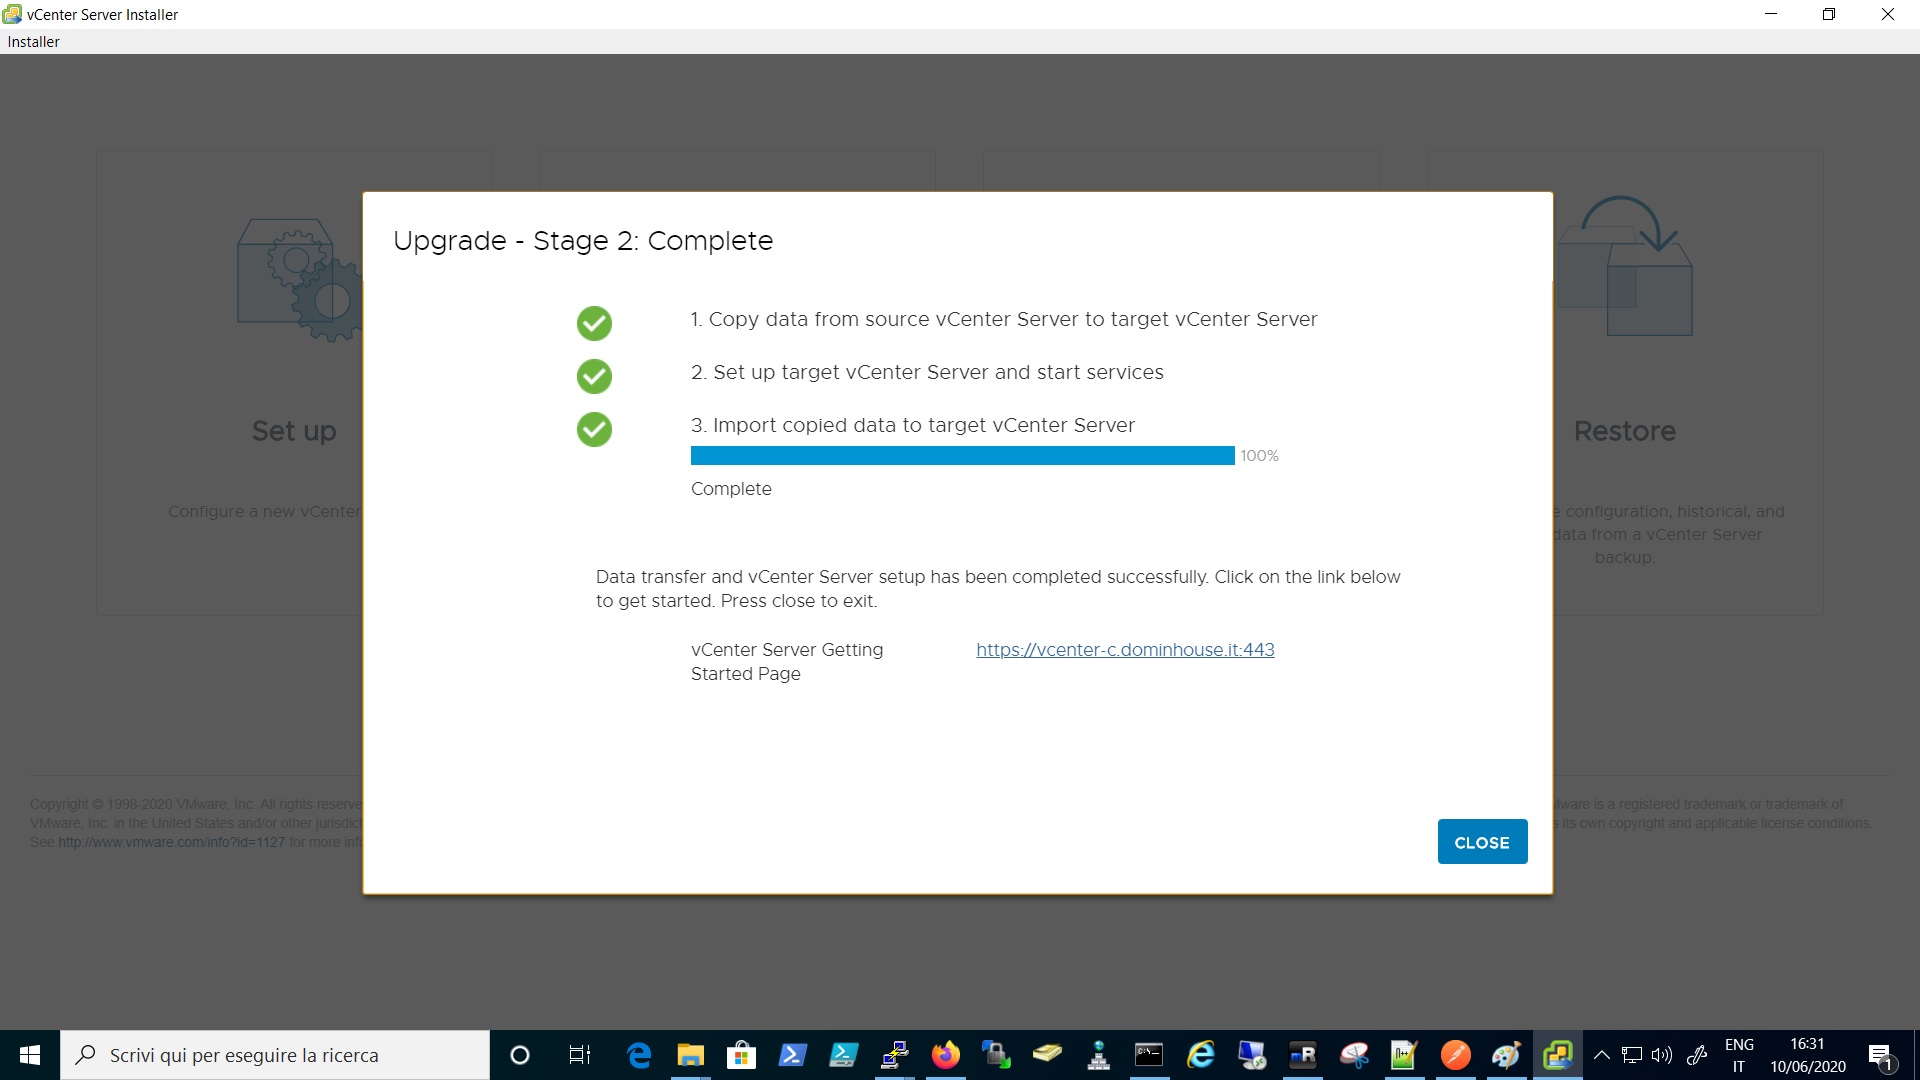
At this point, the upgrade process is completed, the source vCenter at this point is power off and the new vCenter is now up and running at the same address

The first vCenter is done, so after it I basically redo the same steps for other vCenter used in this enviroment and at the STAGE 2 step 3 of the process for this vCenter I’ll choose “Subsquent vCenter”.